Ingredients
Method
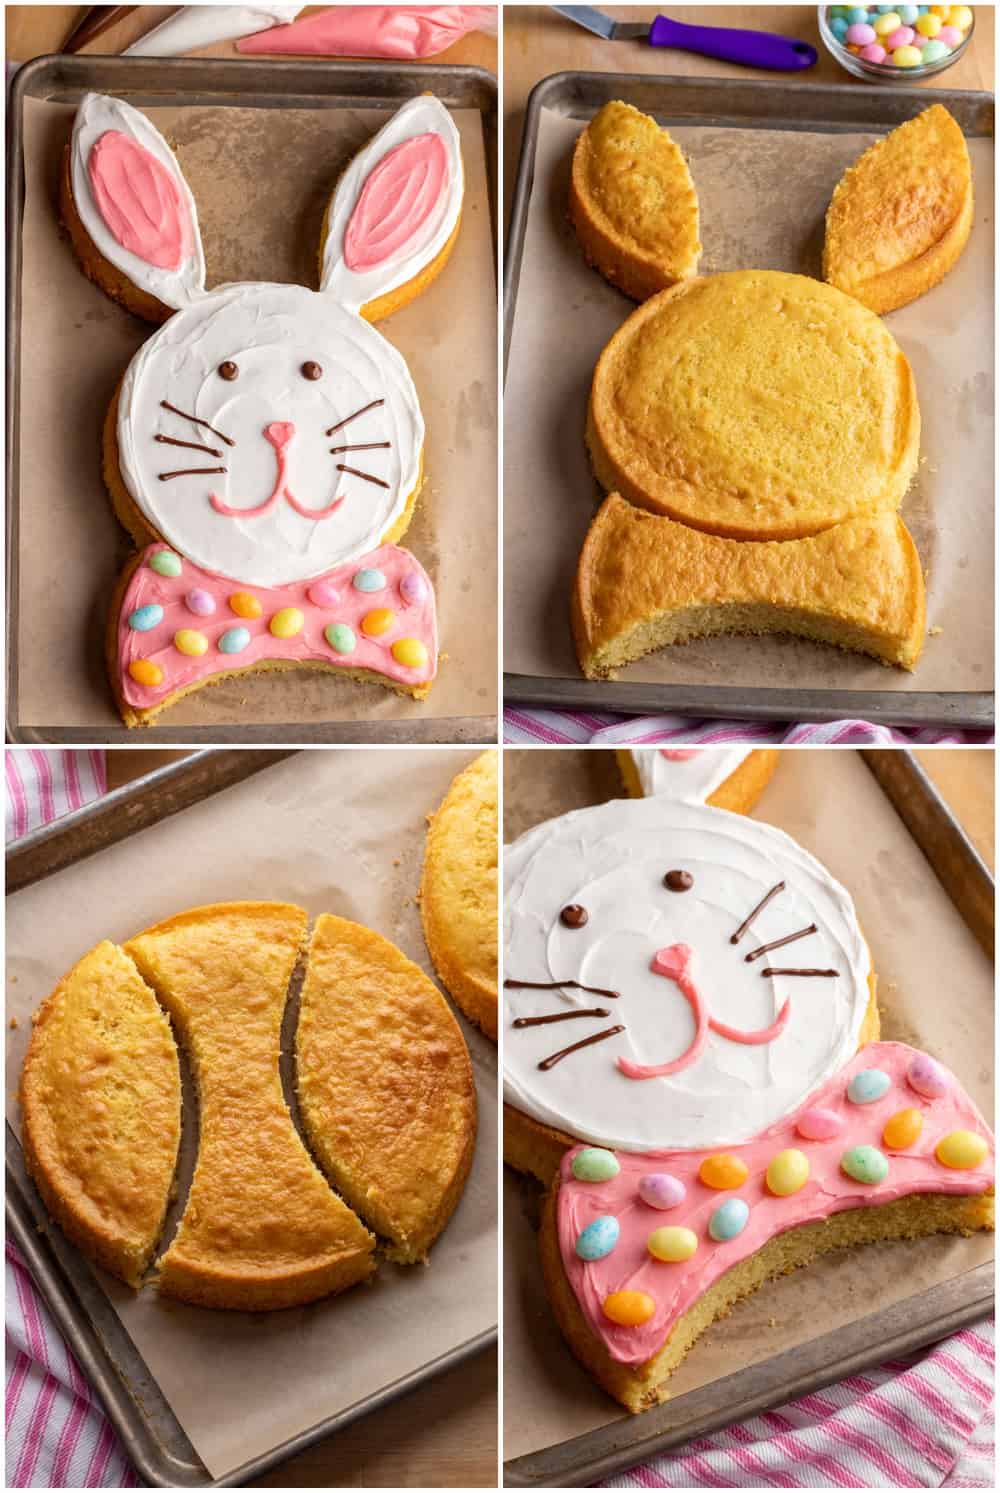
- 1. Bake Your Cake: Start by baking two round cakes using your favorite recipe or a box mix. Once baked, allow them to cool completely. This will make them easier to cut and frost.
- 2. Cutting the Cake for the Bunny Shape:Take one round cake and set it aside as the bunny’s face.With the second round cake, make two cuts to create two ear-shaped pieces and a bow-tie shaped piece. The remaining part from the second round will form the ears and the bow tie (as shown in the post photo).
- 3. Assembling the Bunny: Place the round cake in the center of a large platter or baking pan. Position the two ear pieces at the top and the bow-tie piece at the bottom of the round cake.
- 4. Frosting Your Bunny:Frost the face and ears with white frosting. Smooth it out for a clean look. Use pink frosting to fill in the inner part of the ears and the bow tie.
- 5. Bunny Details: For the bunny's face, use chocolate icing or melted chocolate to draw eyes and whiskers. You can also use chocolate chips (candy melt wafers would work best proportionate to the head size) or small candies for the eyes if preferred.Use pink frosting to pipe on a nose.
- 6. Decorating: Your bunny cake is now complete! It’s a simple yet adorable way to make an Easter dessert that will wow everyone at the table! Decorate the pink bow tie with jellybeans or colorful round candies to add a pop of color and fun.
Video
Notes
Tips:
- If the cake layers are too crumbly, freeze them for about 30 minutes before cutting. This will make the cake firmer and easier to work with.
- If you’re using a store-bought frosting, whipping it with a mixer for a few minutes can make it fluffier and easier to spread.
- Let your creativity shine and include the kids in on the fun! Use different colors and types of candy to personalize your bunny cake.