- 2, 8-inch round cakes (baked and cooled, using your favorite cake mix!)
- Black frosting
- Purple frosting
- Orange frosting
- White frosting
- Piping bags
- Small round piping tip (for eyes)
- Offset spatula or butter knife
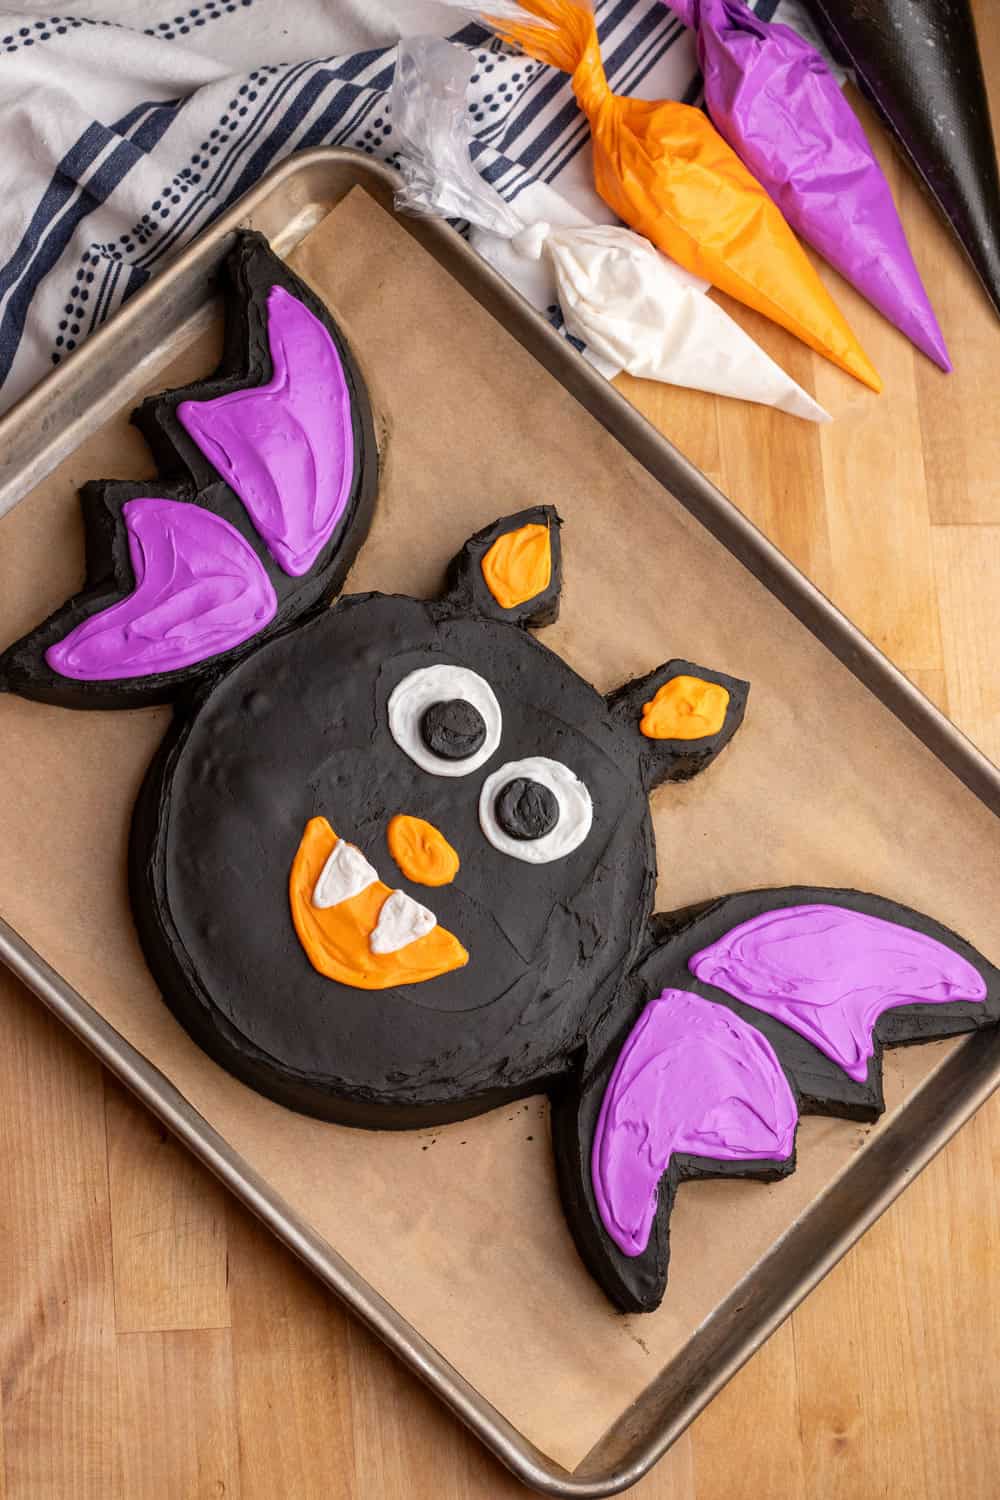
Bake and Cool Your CakesBake your favorite cake mix in two 8-inch round cake pans according to the package instructions. Let the cakes cool completely before starting to assemble and decorate. Shape the Bat’s Body and WingsTake one cake round and place it on your serving platter or cake board. This will become the bat’s body. For the second cake round, use a sharp knife to carefully cut a zigzag/diamond pattern down the center. These pieces will become the bat’s wings and ears.Tip: Think of cutting it like a series of diamond shapes along the cake, which will give the bat a wing-like appearance. You’ll need to trim the pieces so that they look like bat wings when placed on either side of the cake body. You will use the diamond pieces from cutting the wings to represent the bat's ears. Step 3: Assemble the BatPosition the first whole cake (the body) in the center of your cake board or platter. Then, gently arrange the zigzagged pieces from the second cake on either side of the body to form the wings. Place the small diamond-shaped pieces at the top of the body for the ears. The result should resemble a bat with wide wings and pointy ears! Step 4: Ice the CakeUse an offset spatula to cover the entire cake (both the body and wings) with black frosting. Smooth it out for an even finish, making sure the bat has a sleek, glossy look. Step 5: Wing Details and Extra Touches To add a bit more flair to the wings, use purple frosting to pipe in some wing details or accents. You can create subtle curves and lines along the edges of the wings to make them look more bat-like.For the ears, use orange frosting to pipe small details inside the ear shapes. This will give your bat cake a bit more color contrast and help define the features. Step 6: Add Facial FeaturesNow for the fun part—giving your bat some personality! Using white frosting, pipe out two round eyes on the body of the bat. Add tiny black dots for the pupils. You can also pipe out a little bat nose in the center of the face using orange frosting.Next, use the white frosting to pipe on fangs just under the nose for a little spooky touch. Step 7: Serve and Enjoy!Once all your decorating is done, your bat-shaped Halloween cake is ready to impress! Slice it up and enjoy this sweet, spooky treat with friends and family. Whether it’s for a party or just a fun Halloween baking project, this bat cake is sure to be a hit!