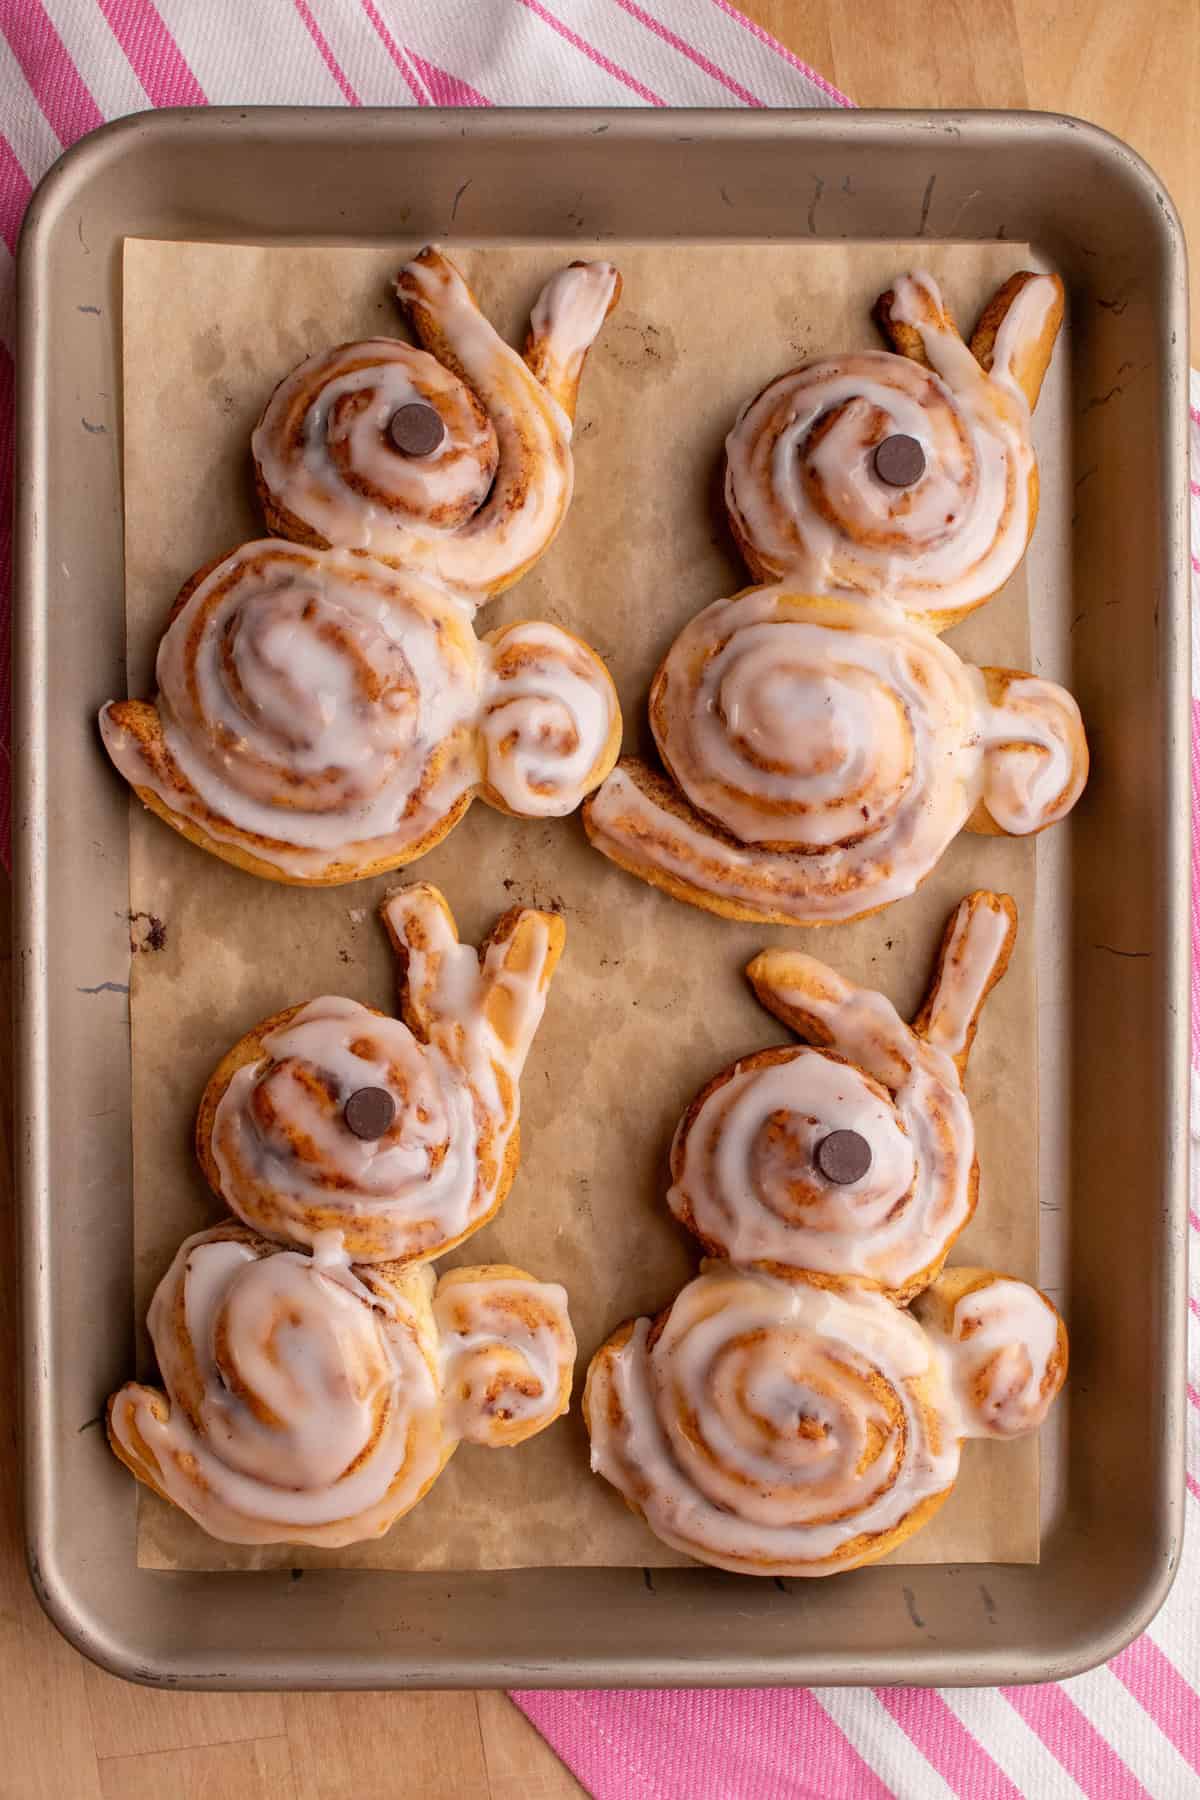
Prepare the Cinnamon Rolls - Start by opening the can of cinnamon rolls and placing the first one directly onto your baking sheet to form the bunny’s body. This will be the main, round part of your bunny.
Shape the Bunny Tail - Next, take a second cinnamon roll and re-roll part of it to make the bunny's tail. You’ll need to roll a small section of the dough into a smaller coil and cut it off from the rest. Then, gently press the smaller roll into a compact shape and place it at the bottom of the body cinnamon roll to create the bunny's fluffy tail.
Create the Bunny’s Head and Ears - For the bunny’s head and ears, take the rest of the second cinnamon roll and unroll it slightly. Cut the unrolled part in half, this will create the bunny’s ears. Place the head above the bunny’s body, pressing them lightly together.
Bake the Bunny Cinnamon Rolls - Preheat your oven and bake at the temperature according to the instructions on the cinnamon roll dough packaging. Bake the bunny-shaped cinnamon rolls on the parchment-lined baking sheet until golden brown. Keep an eye on them towards the end of baking to make sure they don’t burn
Frost the Cinnamon Rolls - Once the bunny rolls have baked to perfection, remove them from the oven and let them cool for just a minute or two. While they’re still warm, spread the included cinnamon roll icing over the top. The sweet glaze will melt slightly into the rolls, making them extra delicious.
Add the Bunny’s Eyes - For the final touch, place one chocolate chip on each bunny’s head as an eye. The chocolate will add a cute, contrasting detail and make the bunny look even more lifelike.