Select Your Candy: Begin by choosing a variety of candy or chocolate boxes. These will form the body of the sleigh. Aim for a range of sizes to create a tiered effect.
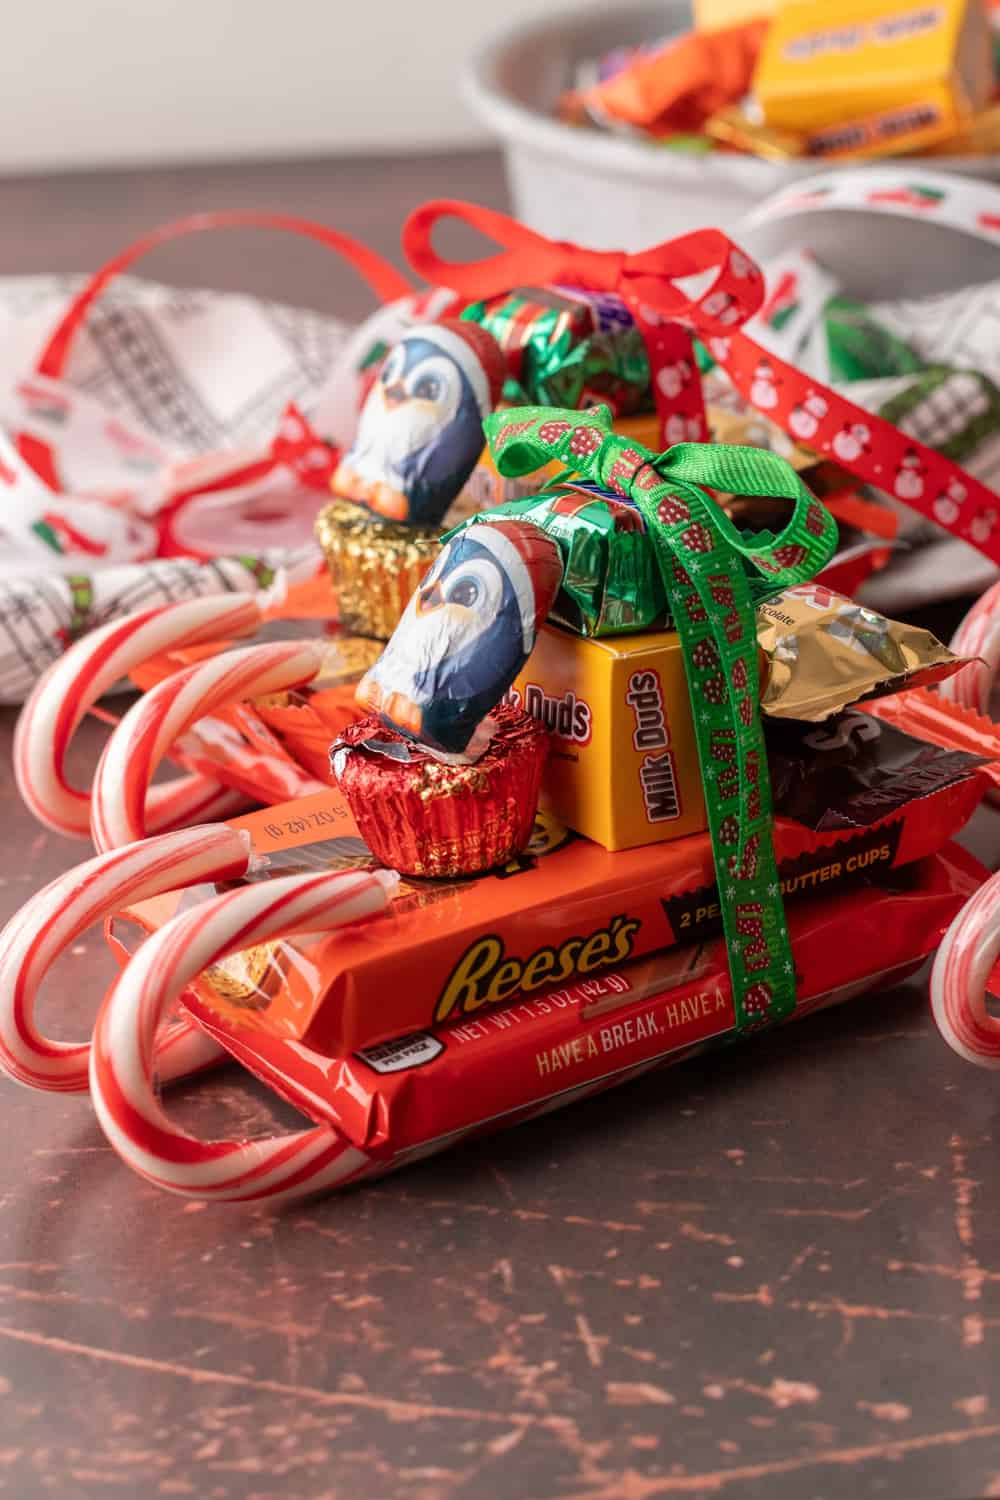
We used these candies in this order from bottom to top:Kit KatReese's Peanut CupsOn top of these, a fun size Hershey's and Twix on one endOne fun size Milk Dud on the centerA small peanut butter cup next to the Milk Dud (this will be your sleigh "seat")A Snickers fun size on top of the Milk DudTwo candy canes on the bottom looping through the ribbonChocolate Penguin on top of the peanut butter cup "seat" Arrange the Sleigh: Place the largest candy box flat on your work surface. This will be the base of your sleigh. Stack the smaller boxes on top, decreasing in size as you build up, to form the seat of the sleigh. You can use glue dots or double stick tape to keep them from sliding off.
Decorate with Ribbon: Wrap a ribbon around the candy boxes to hold them together, tying a bow at the front or top of the sleigh. Choose festive colors or patterns. Don't tie the ribbon super tight as you'll be adding the candy canes through.
Attach the Candy Canes: Use glue dots to affix a candy cane to each side of the largest candy box, curving upwards to create the sleigh's runners.
Add a Chocolate Character: Place a chocolate or candy character on the top tier of the sleigh to "ride" it. We used a chocolate penguin for a fun twist but you can use a Santa for a more traditional look.