Ingredients
Method
Step 1: Bake and Cool Your Cupcakes
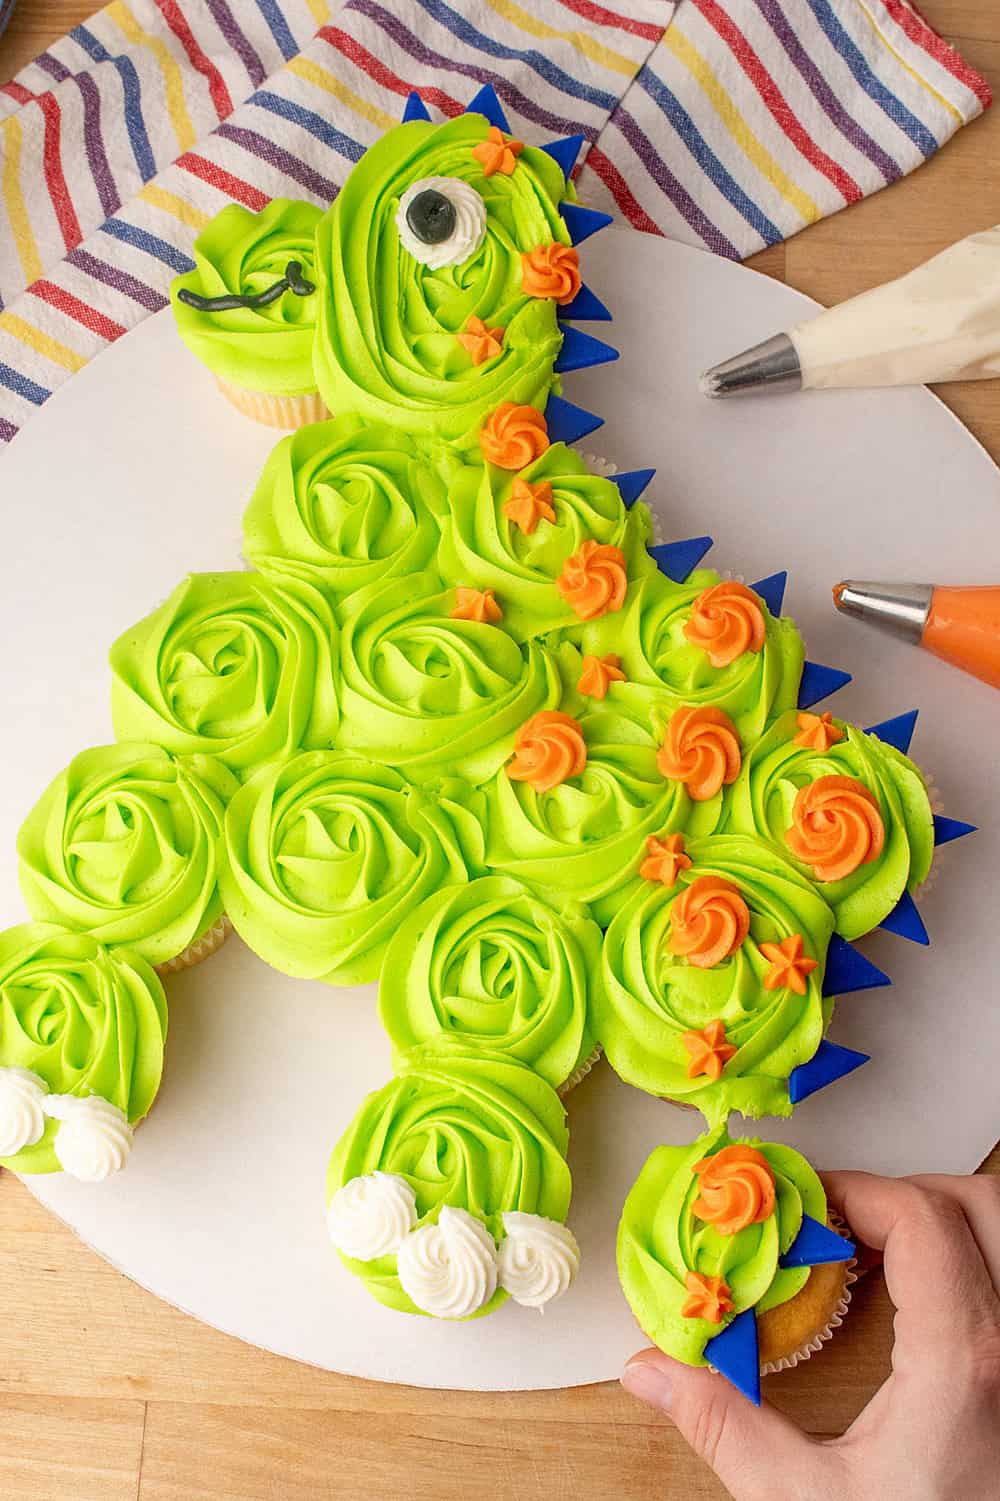
Bake your cupcakes and allow them to cool completely. Warm cupcakes and buttercream are not friends, patience pays off here!- Step 2: Arrange the Cupcakes into a Dinosaur ShapeOn a large platter or cake board, arrange your cupcakes to form the dinosaur’s body, head, and tail. The body should be the largest section, with a smaller head at one end and a tapered tail at the other. See the photo for reference.
- Step 3: Pipe the Light Green Buttercream RosettesFill a piping bag fitted with a large rosette tip with light green buttercream. Pipe rosettes over the body, head, and tail, starting in the center of each cupcake and swirling outward so the rosettes blend together.For the base of the head, pipe one large rosette across two cupcakes to help the head look smooth and connected. For the end of the tail, we did a sort of half rosette with the end tapered out.
- Step 4: Create the Dino’s FaceUsing white frosting and a small star tip, pipe the white of the eye onto the head. Add claws along the body and feet using the same white frosting and star tip. Switch to black frosting to pipe the pupil of the eye and add simple mouth details to give your dinosaur some personality.
- Step 5: Add Orange Back DetailsWith orange frosting and a small star tip, pipe small dots and tiny rosettes along the dinosaur’s back. These little pops of color add texture and make your dino extra playful.
- Step 6: Make and Add the Fondant SpikesRoll out blue fondant and cut or shape small triangle spikes. Let them sit for a bit until they firm up, this helps them stand nicely. Once set, gently place them along the dinosaur’s back, starting at the head and continuing down to the tail.
Notes
*store-bought frosting can be soft for piping. You can add ½-¾ cup of sifted powdered sugar to one can of frosting to stiffen it up. Mix well with a blender until fluffy. Add a few pinches of salt to balance the sweetness.