Chomp Into This Cute Dinosaur Cupcake Cake
By using this site, you agree to our Terms of Use. This post may contain affiliate links. Read our disclosure policy.
Follow us on YouTube for more fun food ideas for kids!
Create a fun dinosaur cupcake cake with bright frosting and playful details kids will love. Perfect for birthdays, parties, or baking together.
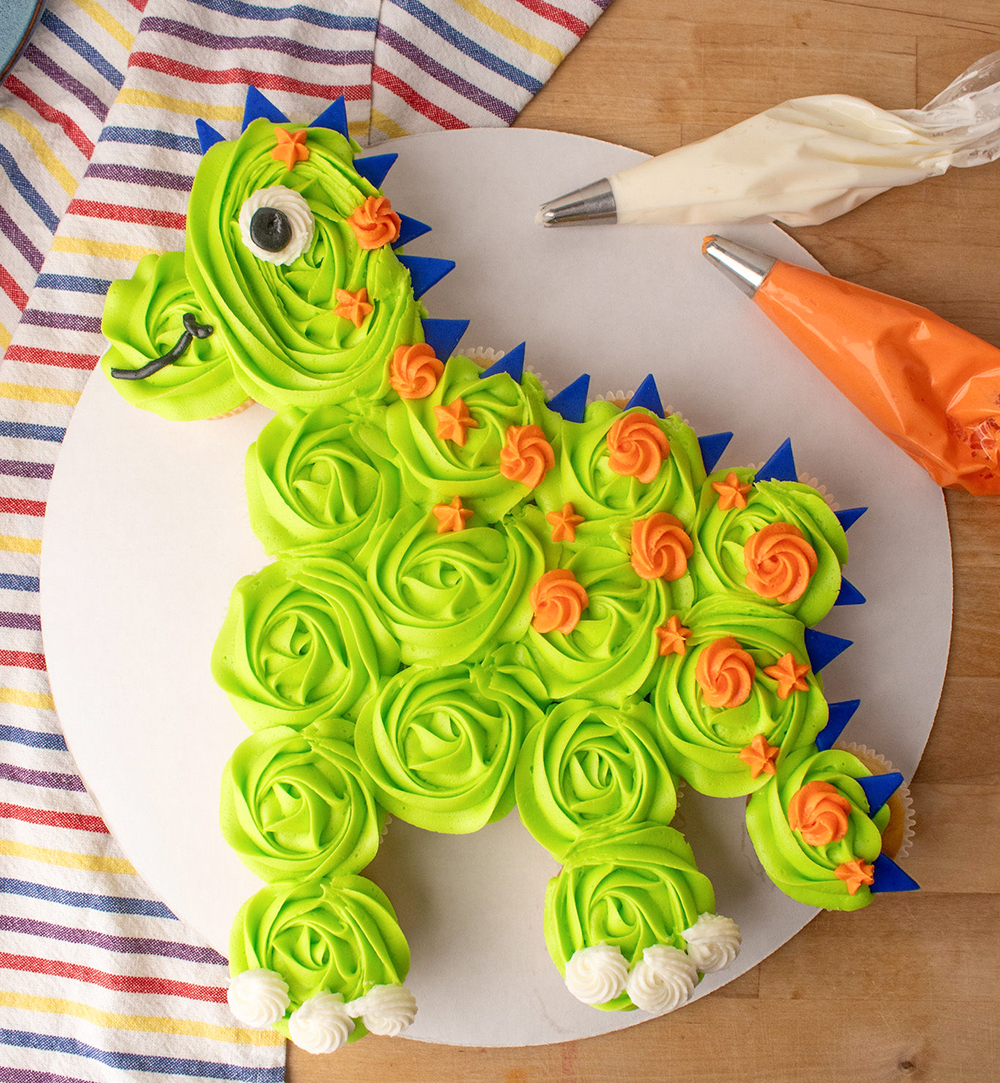
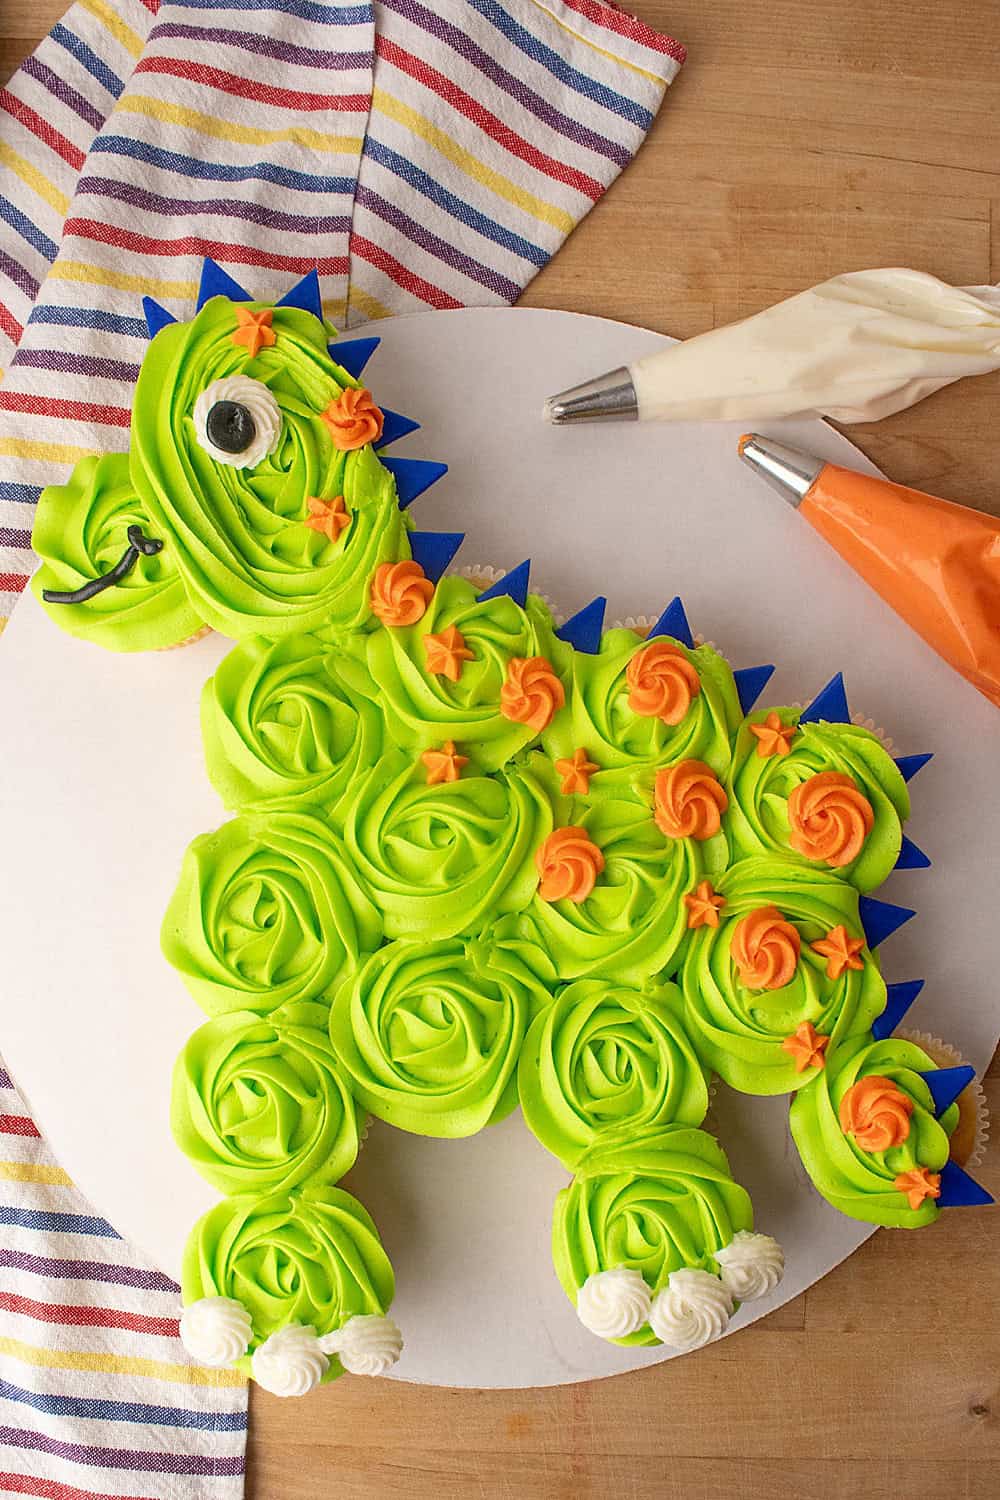
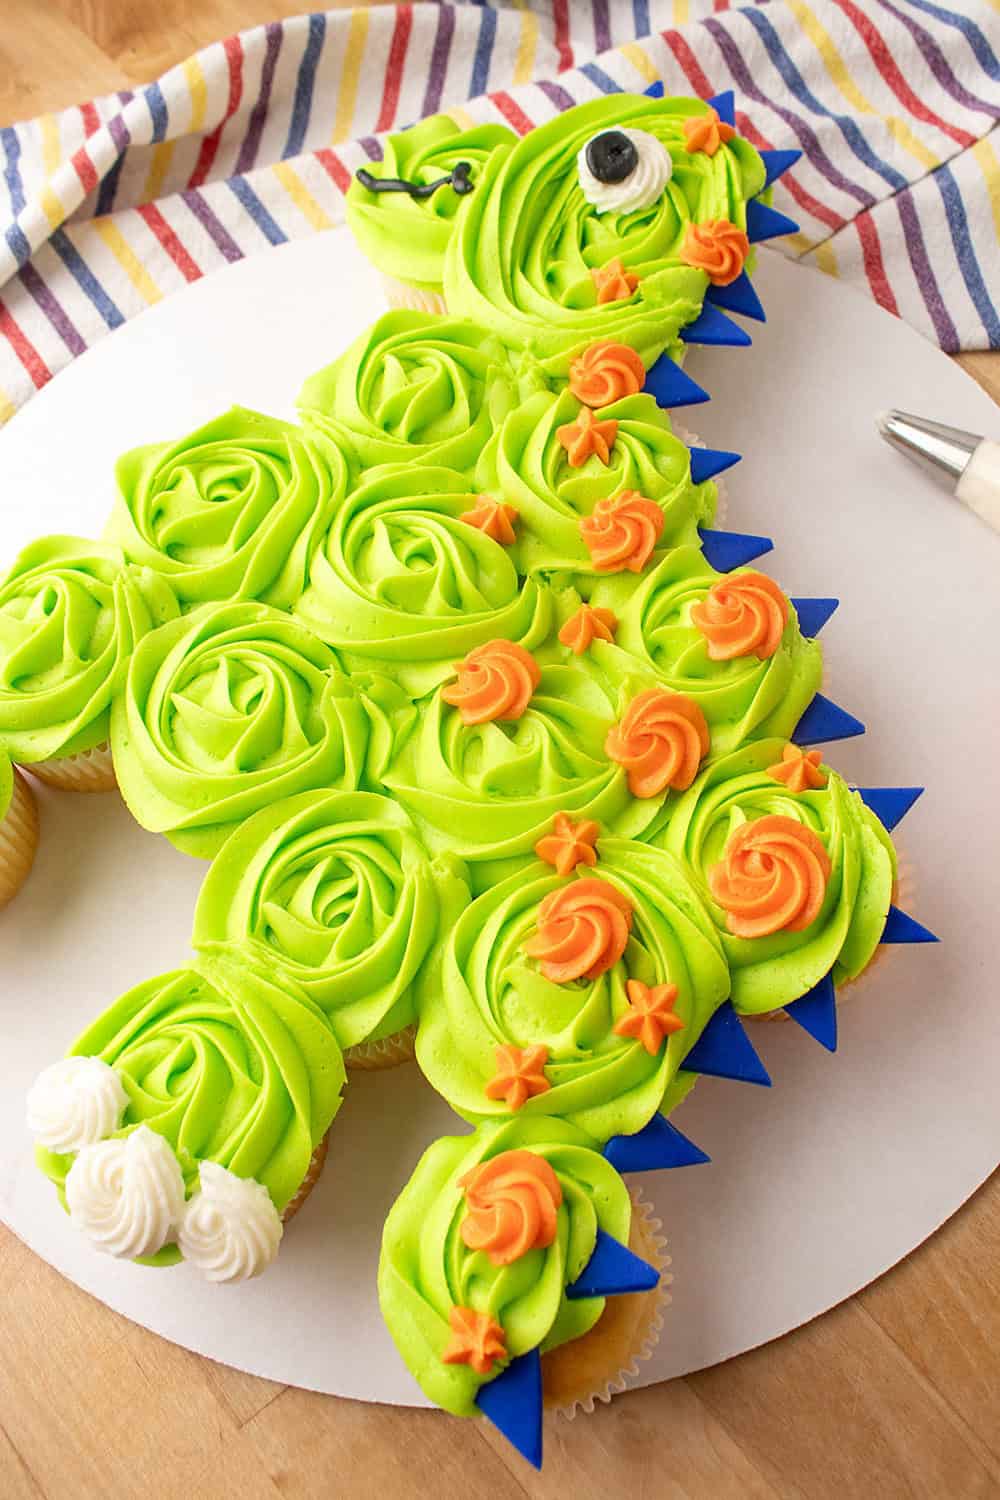
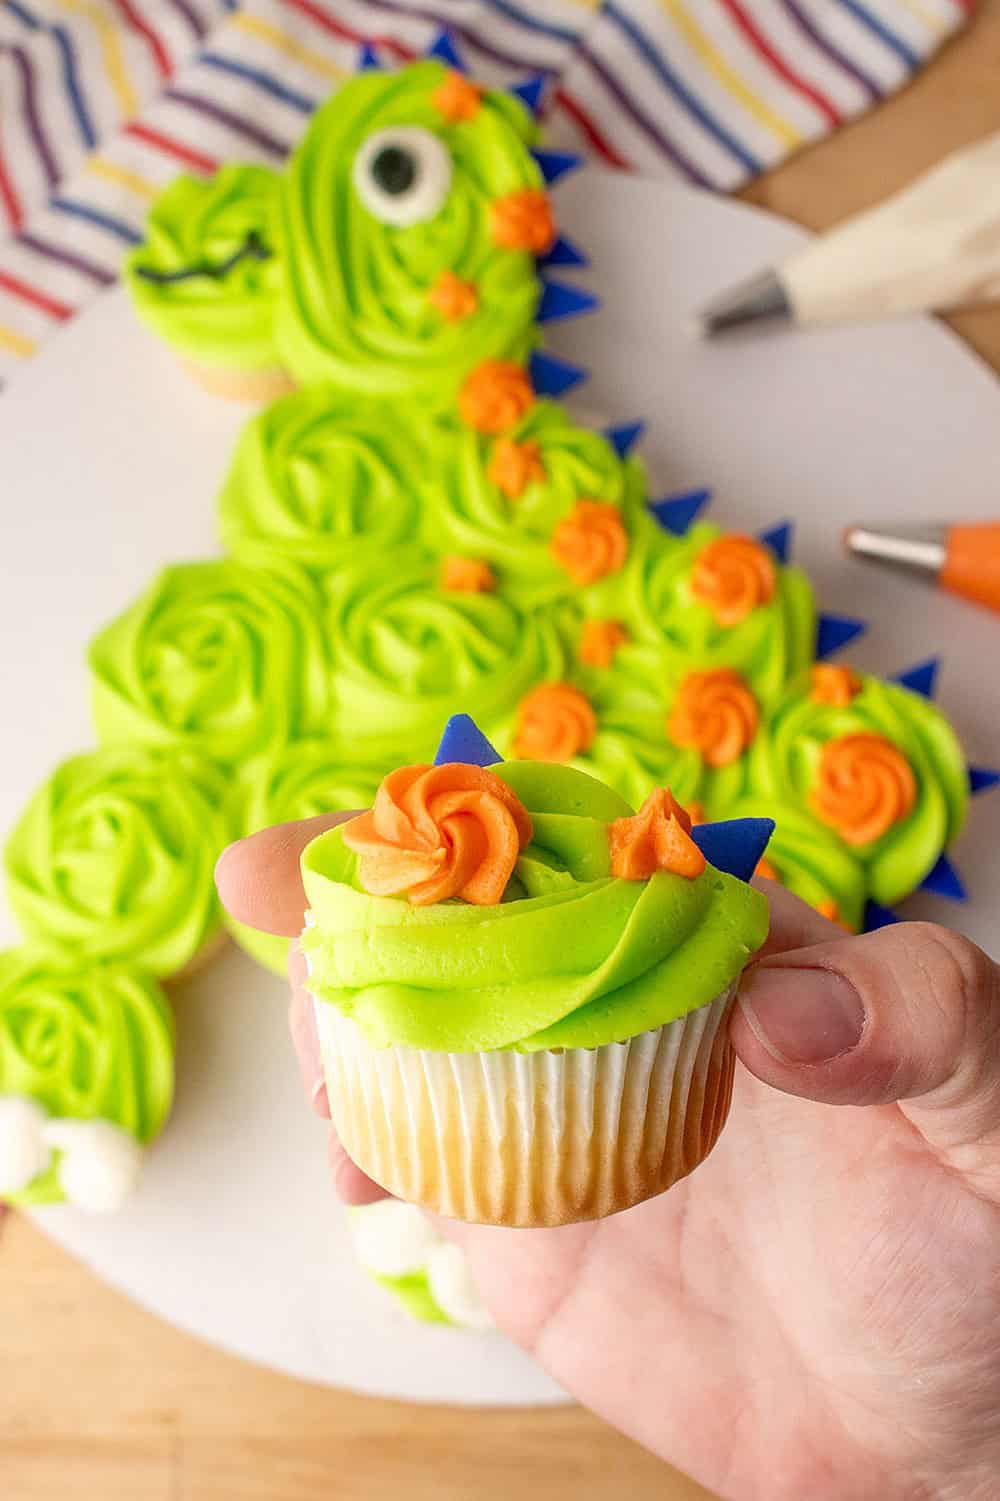
Chomp into some prehistoric fun with this adorable Dinosaur Pull-Apart Cupcake Cake! Covered in soft light green buttercream rosettes, dotted with bright orange details, and topped with fondant spikes, this dino dessert is perfect for birthday parties, classroom celebrations, or any day you want to bring a little Jurassic joy to the table. Best part? It’s made entirely from cupcakes so serving is a breeze. Follow this easy step-by-step guide to create a dino-shaped cupcake cake that’s cute, colorful, and totally roar-worthy.
Pull-Apart Dinosaur Cupcake Cake - Ingredients
- 17 Cupcakes (baked and completely cooled, any flavor you like – quantity depends on your dino shape)
- Light green buttercream frosting (*store-bought is fine)
- White frosting
- Orange frosting
- Black frosting
- Blue fondant
- Piping bags
- Large rosette tip (like Wilton 1M or similar)
- Small star tips (for details and accents)
- Small round tip (or snip the bag) for eyes and mouth
- Large platter or cake board
*store-bought frosting can be soft for piping. You can add ½-¾ cup of sifted powdered sugar to one can of frosting to stiffen it up. Mix well with a blender until fluffy. Add a few pinches of salt to balance the sweetness.
Instructions:
Step 1: Bake and Cool Your Cupcakes
Bake your cupcakes and allow them to cool completely. Warm cupcakes and buttercream are not friends, patience pays off here!
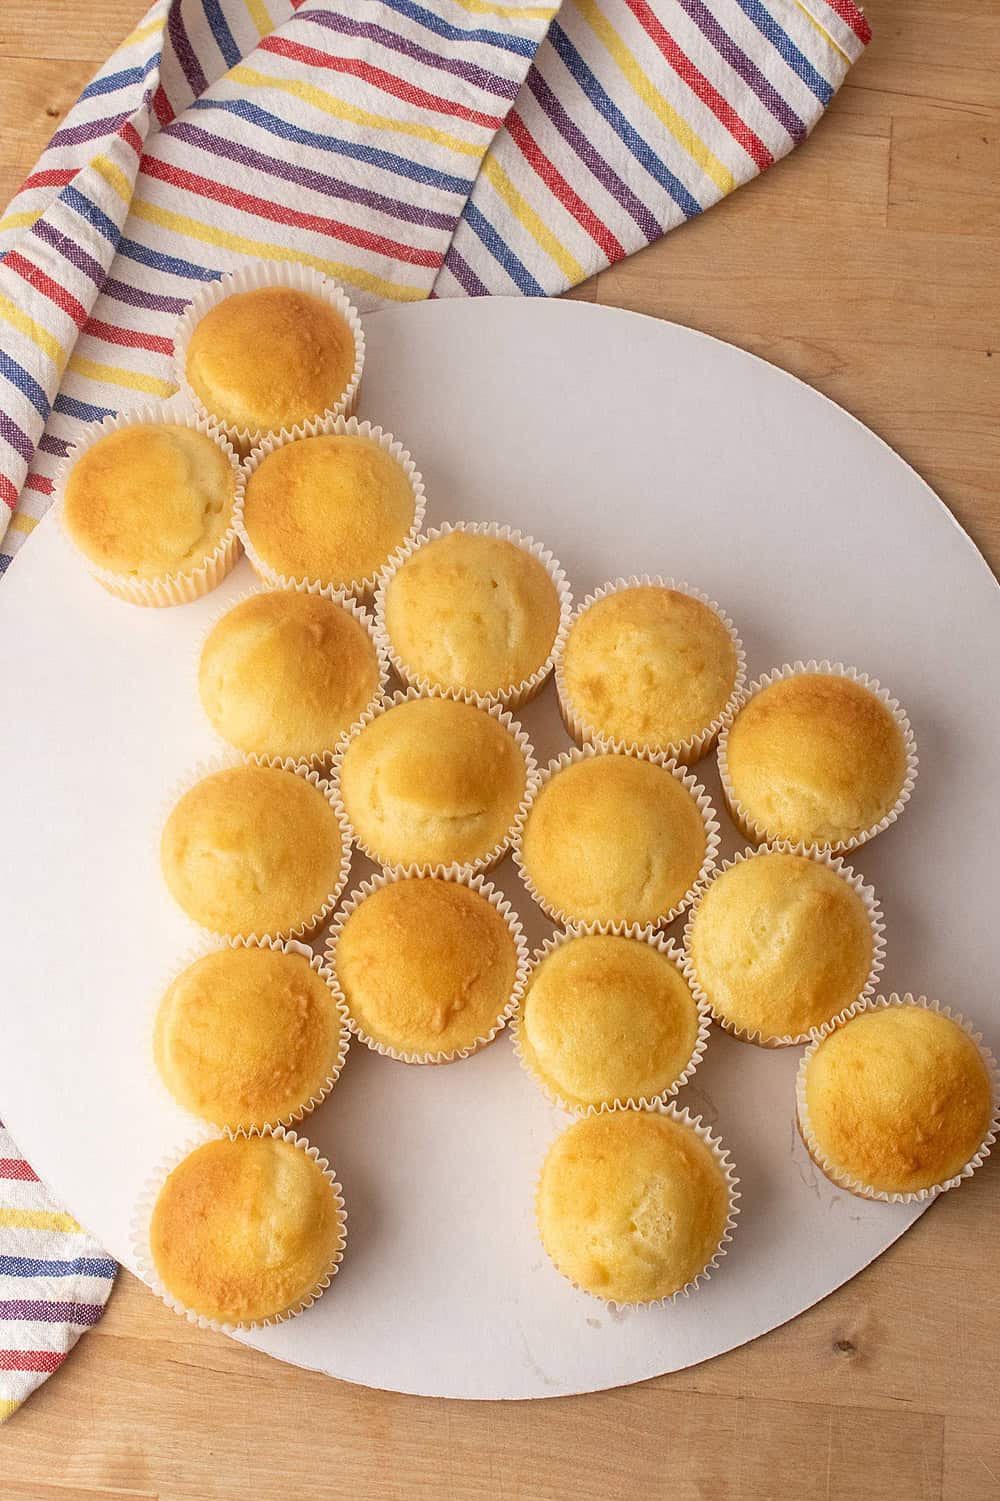
Step 2: Arrange the Cupcakes into a Dinosaur Shape
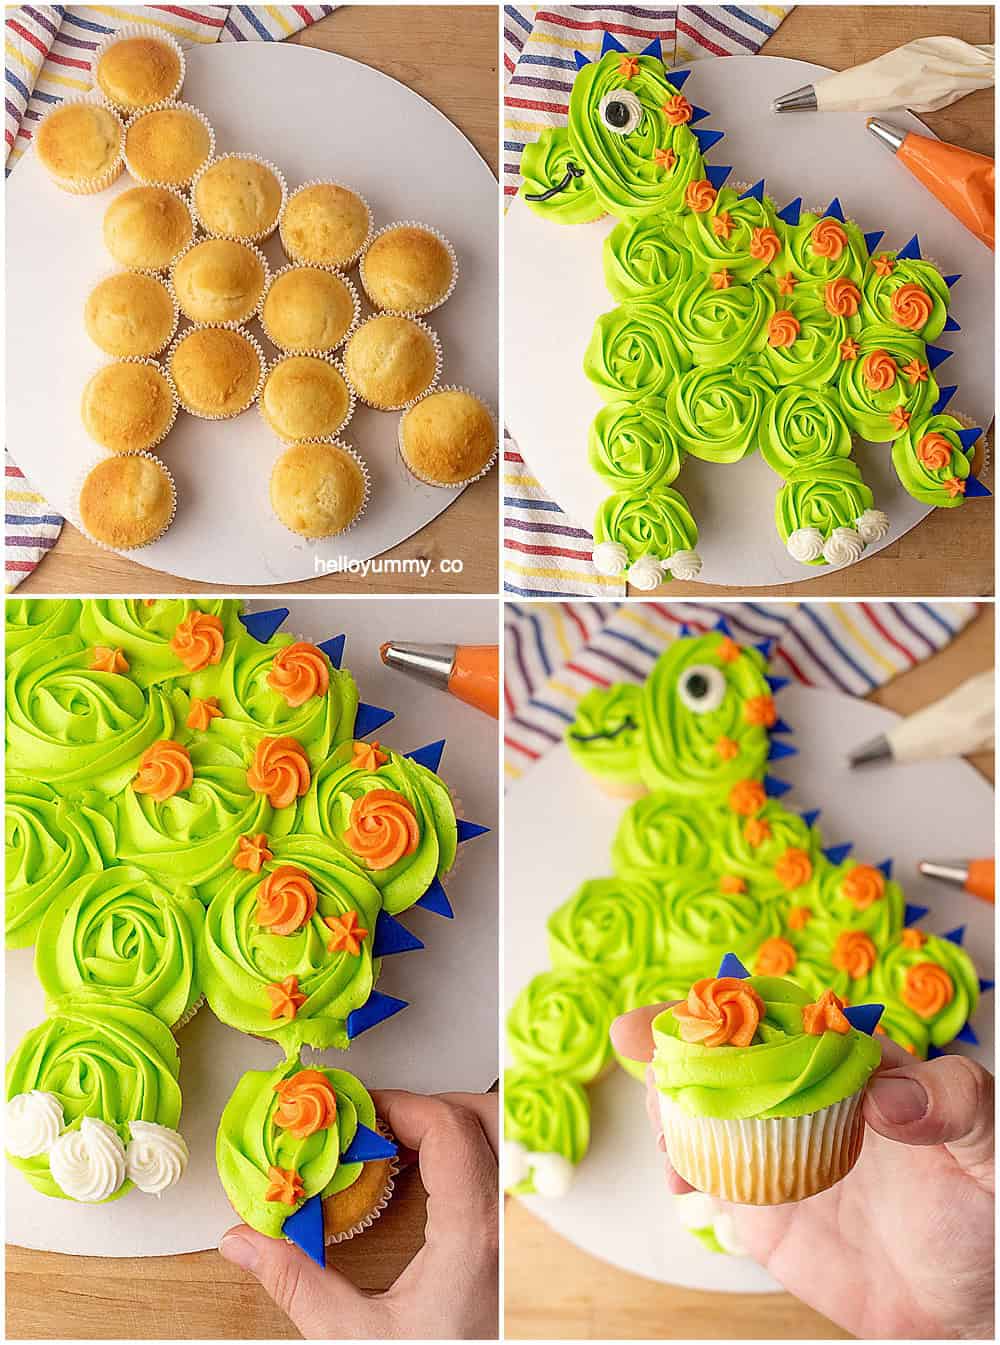
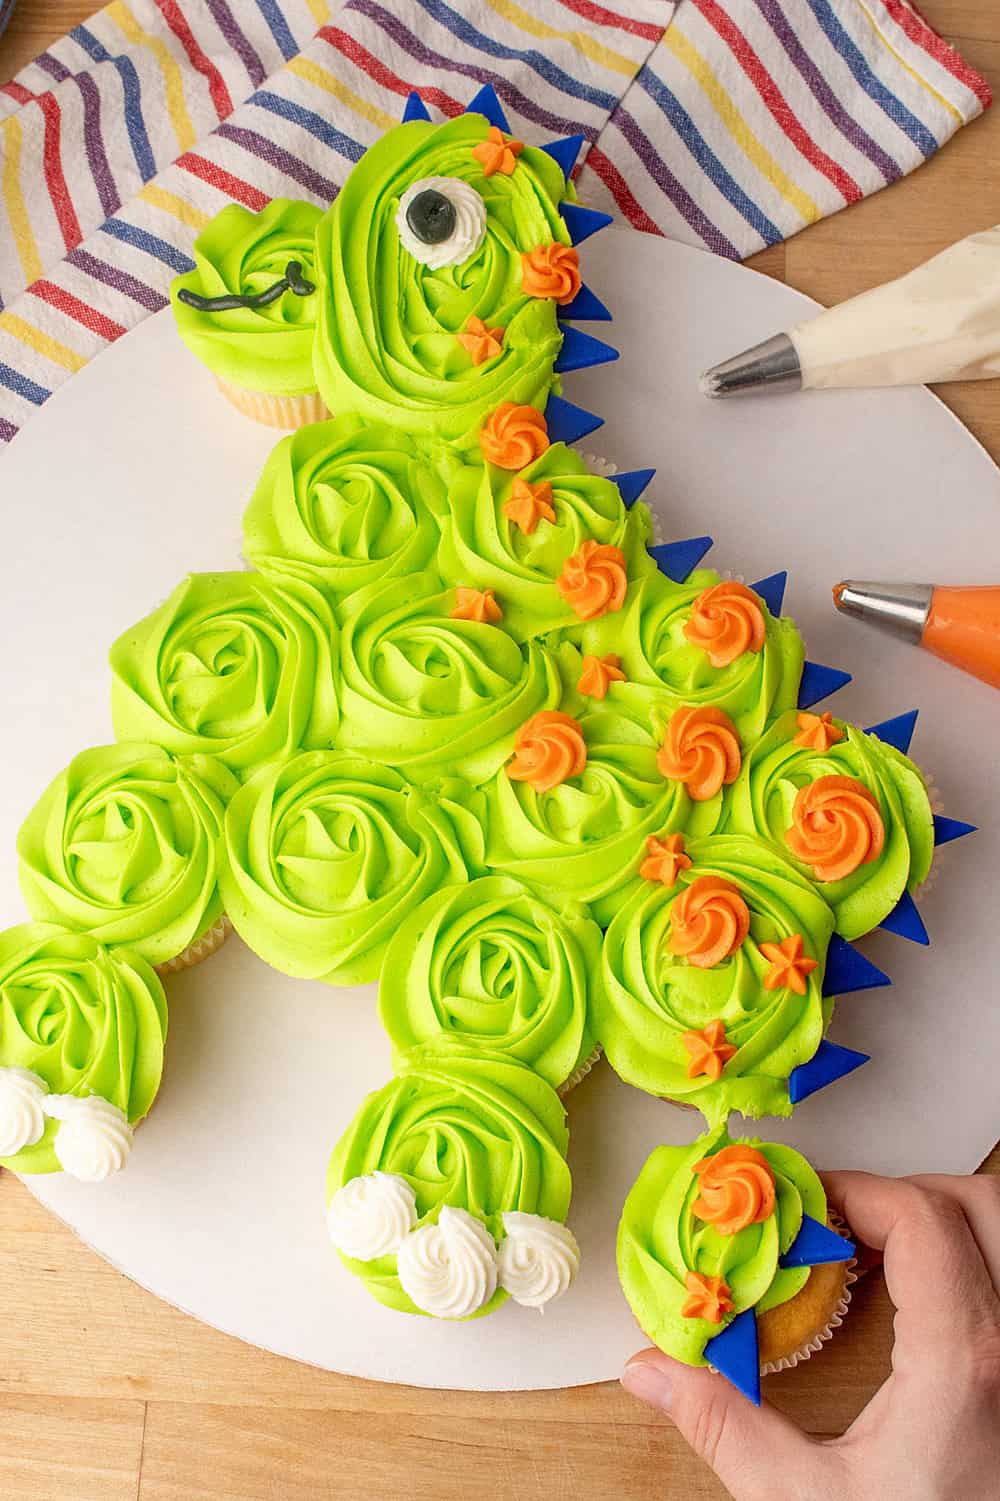
On a large platter or cake board, arrange your cupcakes to form the dinosaur’s body, head, and tail. The body should be the largest section, with a smaller head at one end and a tapered tail at the other. See the photo for reference.
Step 3: Pipe the Light Green Buttercream Rosettes
Fill a piping bag fitted with a large rosette tip with light green buttercream. Pipe rosettes over the body, head, and tail, starting in the center of each cupcake and swirling outward so the rosettes blend together.
For the base of the head, pipe one large rosette across two cupcakes to help the head look smooth and connected. For the end of the tail, we did a sort of half rosette with the end tapered out.
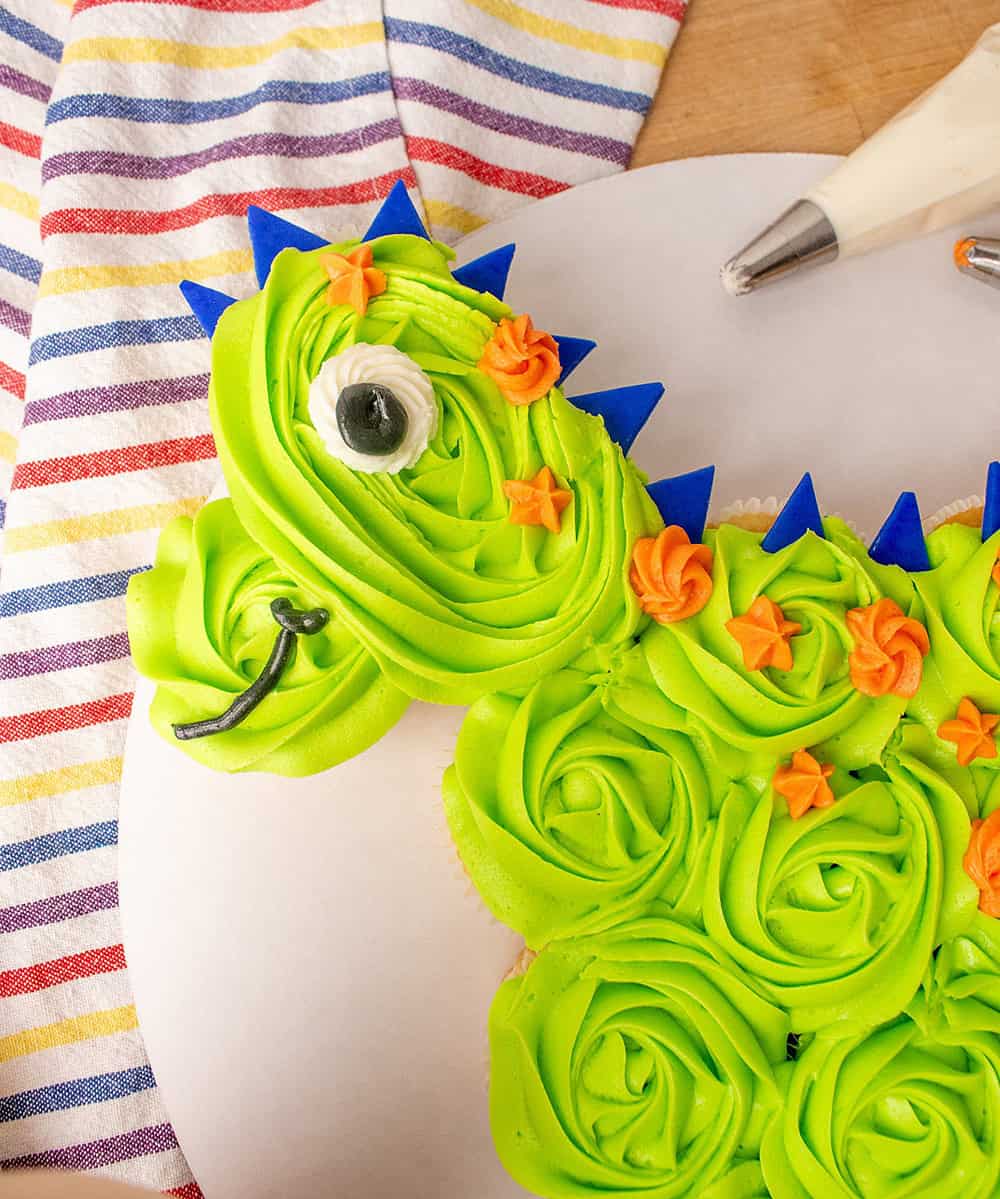
Step 4: Create the Dino’s Face
Using white frosting and a small star tip, pipe the white of the eye onto the head. Add claws along the body and feet using the same white frosting and star tip.
Switch to black frosting to pipe the pupil of the eye and add simple mouth details to give your dinosaur some personality.
Step 5: Add Orange Back Details
With orange frosting and a small star tip, pipe small dots and tiny rosettes along the dinosaur’s back. These little pops of color add texture and make your dino extra playful.
Step 6: Make and Add the Fondant Spikes
Roll out blue fondant and cut or shape small triangle spikes. Let them sit for a bit until they firm up, this helps them stand nicely. Once set, gently place them along the dinosaur’s back, starting at the head and continuing down to the tail.
Final Thoughts
This Dinosaur Pull-Apart Cupcake Cake is a total crowd-pleaser. It’s fun to make, easy to serve, and guaranteed to get oohs and ahhs before it gets devoured. Perfect for dinosaur-themed birthdays or any party that calls for something a little wild, this sweet dino won’t go extinct anytime soon. Just be sure to grab a photo before your guests pull it apart because this dino is going to disappear fast!
Dinosaur cupcake cake
Ingredients
Method
Step 1: Bake and Cool Your Cupcakes
Bake your cupcakes and allow them to cool completely. Warm cupcakes and buttercream are not friends, patience pays off here!- Step 2: Arrange the Cupcakes into a Dinosaur ShapeOn a large platter or cake board, arrange your cupcakes to form the dinosaur’s body, head, and tail. The body should be the largest section, with a smaller head at one end and a tapered tail at the other. See the photo for reference.
- Step 3: Pipe the Light Green Buttercream RosettesFill a piping bag fitted with a large rosette tip with light green buttercream. Pipe rosettes over the body, head, and tail, starting in the center of each cupcake and swirling outward so the rosettes blend together.For the base of the head, pipe one large rosette across two cupcakes to help the head look smooth and connected. For the end of the tail, we did a sort of half rosette with the end tapered out.
- Step 4: Create the Dino’s FaceUsing white frosting and a small star tip, pipe the white of the eye onto the head. Add claws along the body and feet using the same white frosting and star tip. Switch to black frosting to pipe the pupil of the eye and add simple mouth details to give your dinosaur some personality.
- Step 5: Add Orange Back DetailsWith orange frosting and a small star tip, pipe small dots and tiny rosettes along the dinosaur’s back. These little pops of color add texture and make your dino extra playful.
- Step 6: Make and Add the Fondant SpikesRoll out blue fondant and cut or shape small triangle spikes. Let them sit for a bit until they firm up, this helps them stand nicely. Once set, gently place them along the dinosaur’s back, starting at the head and continuing down to the tail.
Notes
Tried this recipe?
Let us know how it was!
Agnes Hsu is a mom of three and has been inspiring parents and kids to get creative with easy activities and family friendly recipes for over 10 years. She shares her love for creative play and kids food to her 2MM+ followers online. Agnes' commitment to playful learning and kindness has not only raised funds for charity but also earned features in prestigious nationwide publications.