This Easy Black Cat Cake Is The Perfect Halloween Dessert
Follow us on Instagram for more fun ideas for kids!
By using this site, you agree to our Terms of Use. This post may contain affiliate links. Read our disclosure policy. As an Amazon Influencer, I earn from qualifying purchases.
Learn how to make an easy Halloween cat cake using just two cake rounds. A fun Halloween dessert anyone can make!
This spooky Black Cat Halloween Cake isn’t just a fun Halloween dessert, it's a fun way to explore your creativity in the kitchen! Especially if you’re baking with little ghouls and goblins..aka your kids of course! With just a few simple ingredients and easy steps, you can turn two ordinary cake rounds into a bewitching black cat that’s sure to steal the show at your Halloween event!
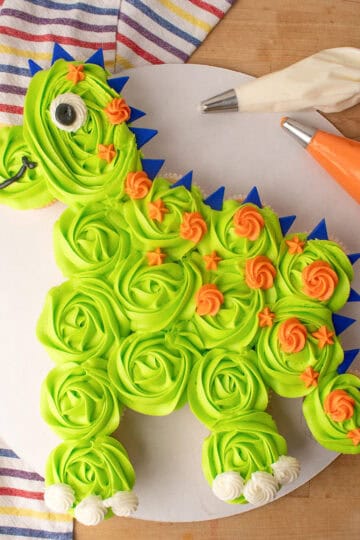
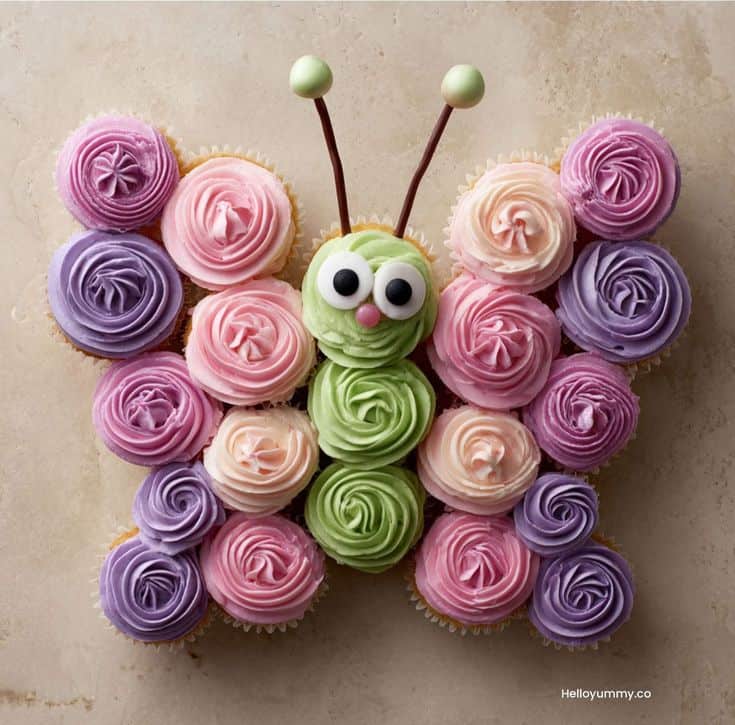
We love using easy cake hacks to make perfect-looking treats that anyone can make - no baking experience needed! Make sure to check out our easy butterfly cake and unicorn cake that also cleverly use cake rounds cut into strategic pieces to make adorable cakes!
Black Cat Cake Ingredients
- Two 8 inch round cakes (baked and cooled, using your favorite cake mix!)
- Black icing
- White icing
- Orange icing
- Green icing
- Piping bags
- Small star piping tip
- Knife
- Offset spatula or butter knife

How to make a Halloween cat cake
Step 1: Bake and Cool Your Cakes
Start by baking your favorite cake mix in two 8 inch round pans according to the package instructions. Allow the cakes to cool completely before moving on to shaping and decorating.
Step 2: Shape Your Black Cat
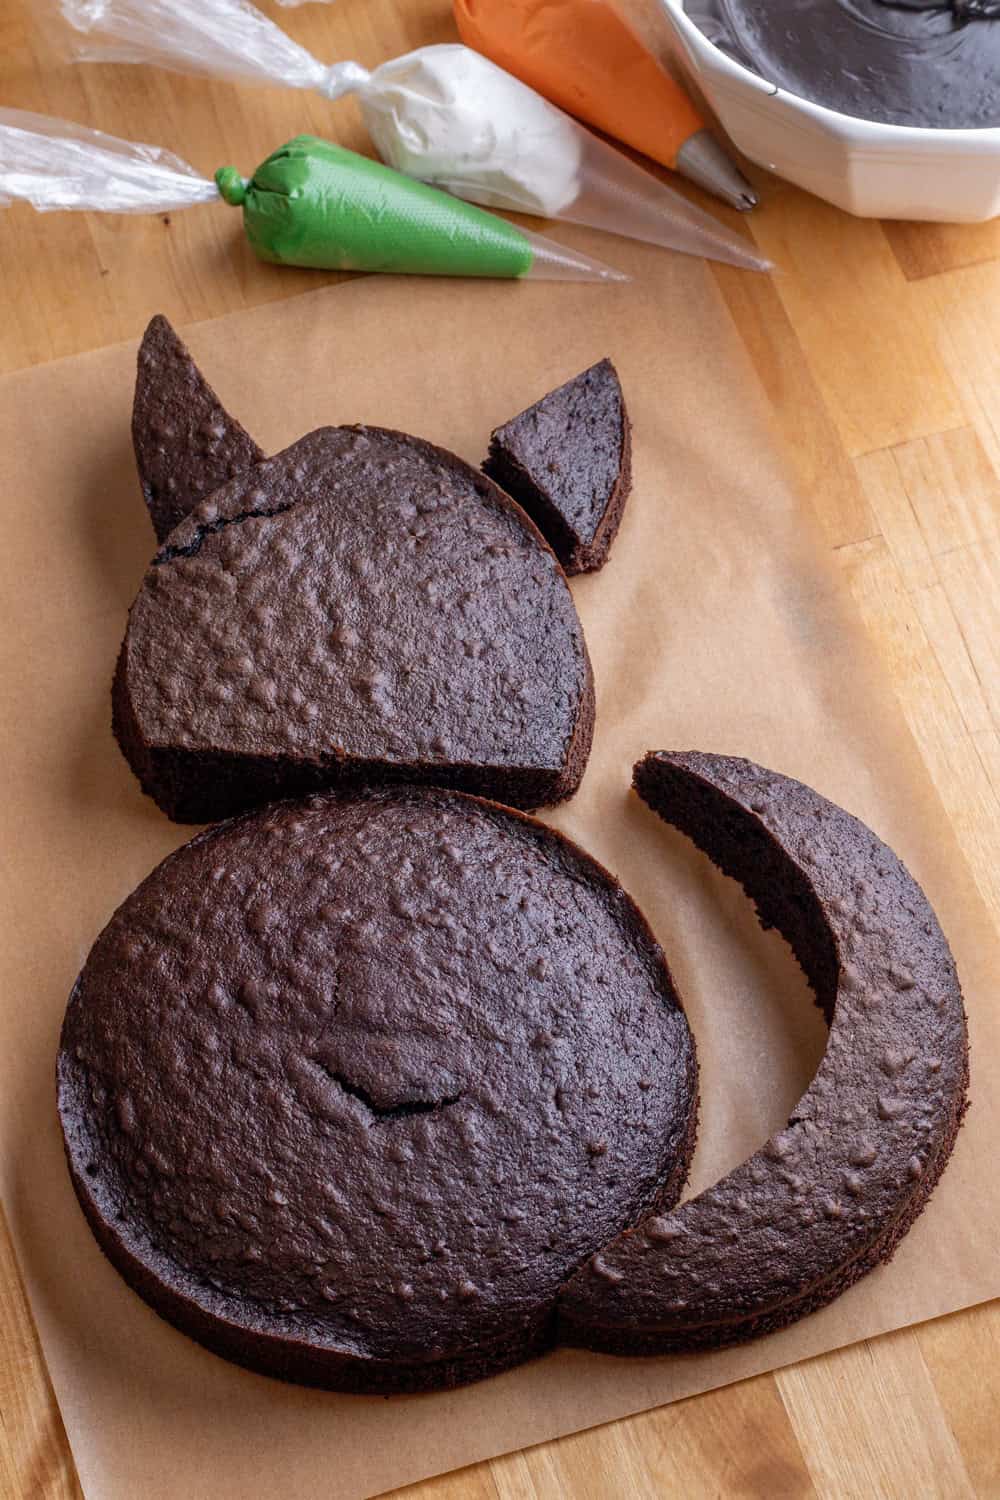
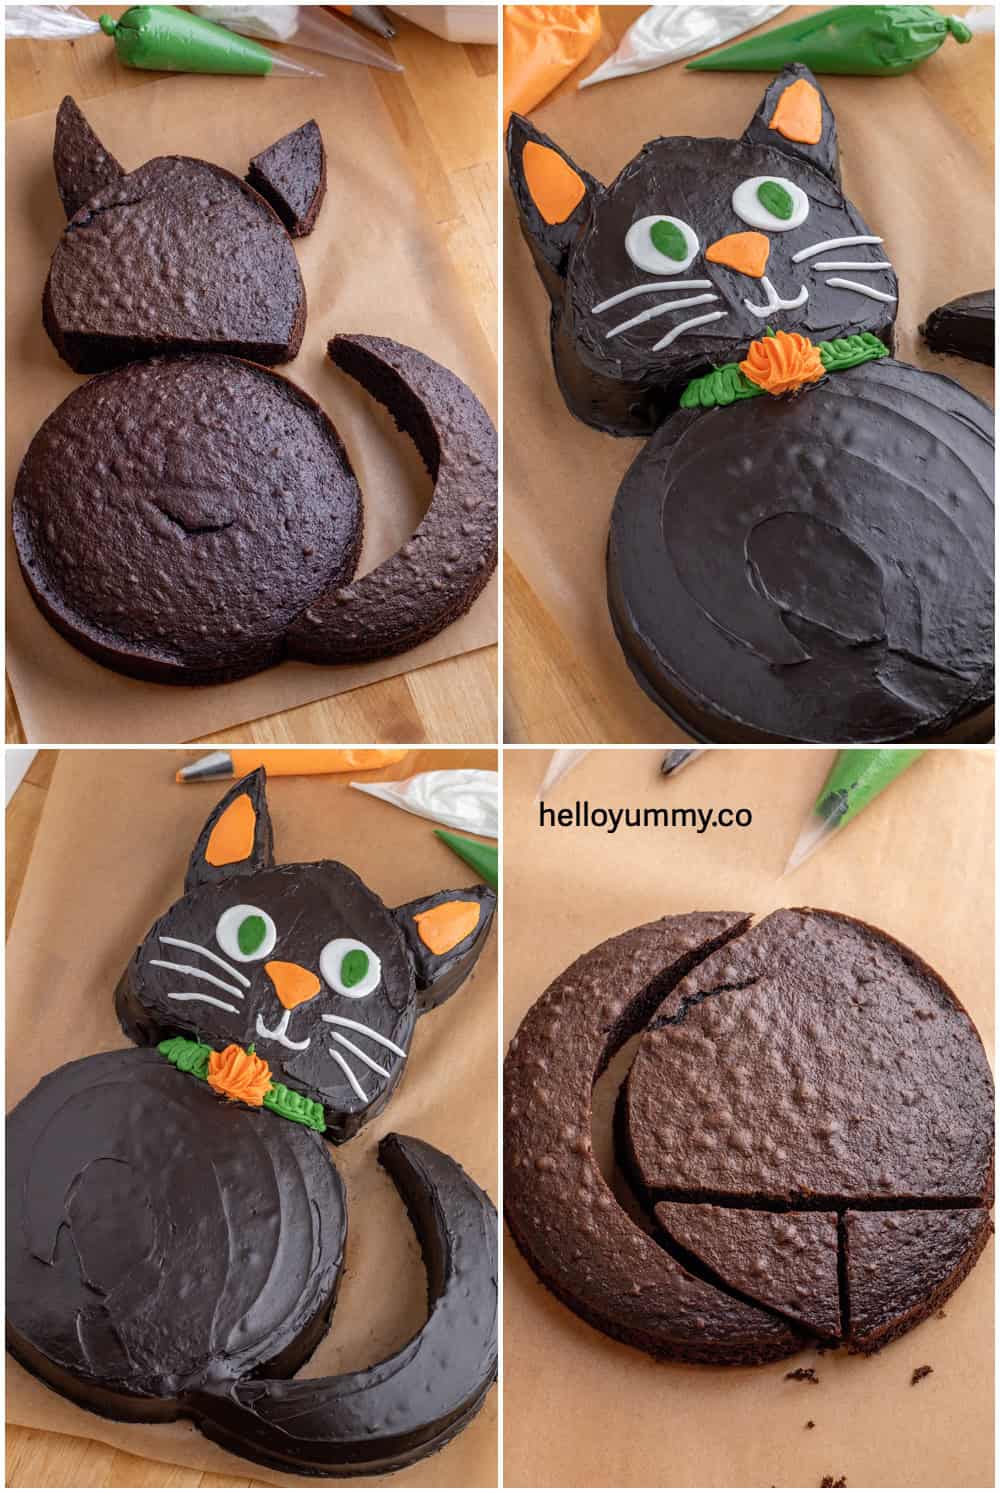
Once cooled, place one cake on a clean, flat surface—this will be the body of the cat. For the second cake, use a sharp knife to cut it into pieces that will become the head, ears, and tail. Please see the photo to see how to cut the cake.
Step 3: Assemble the Cat
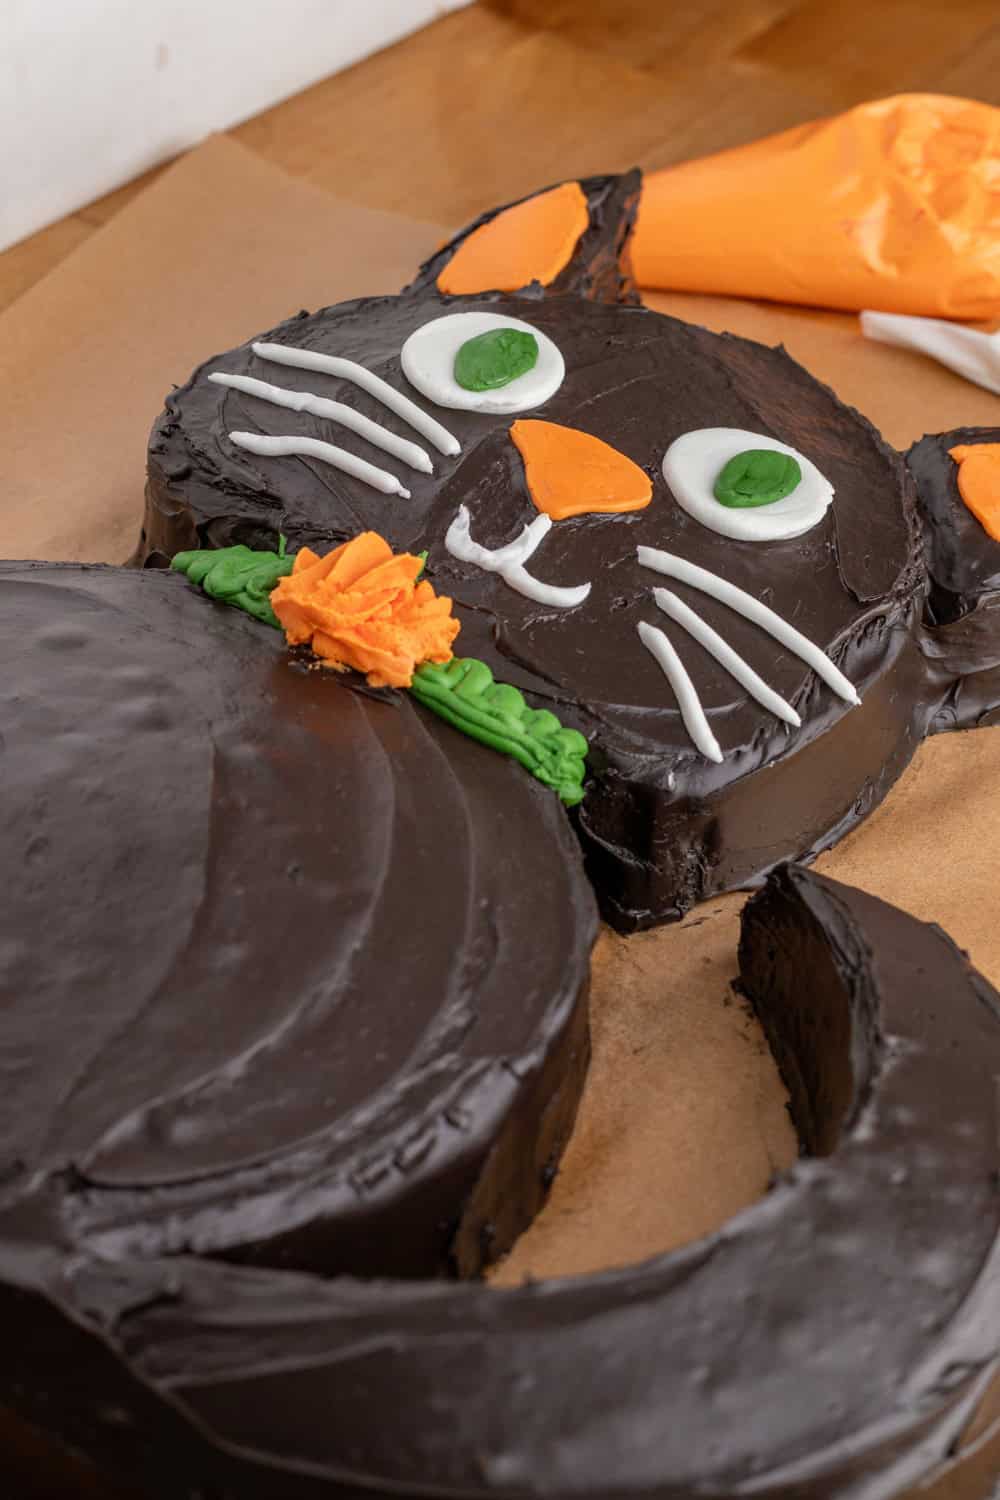
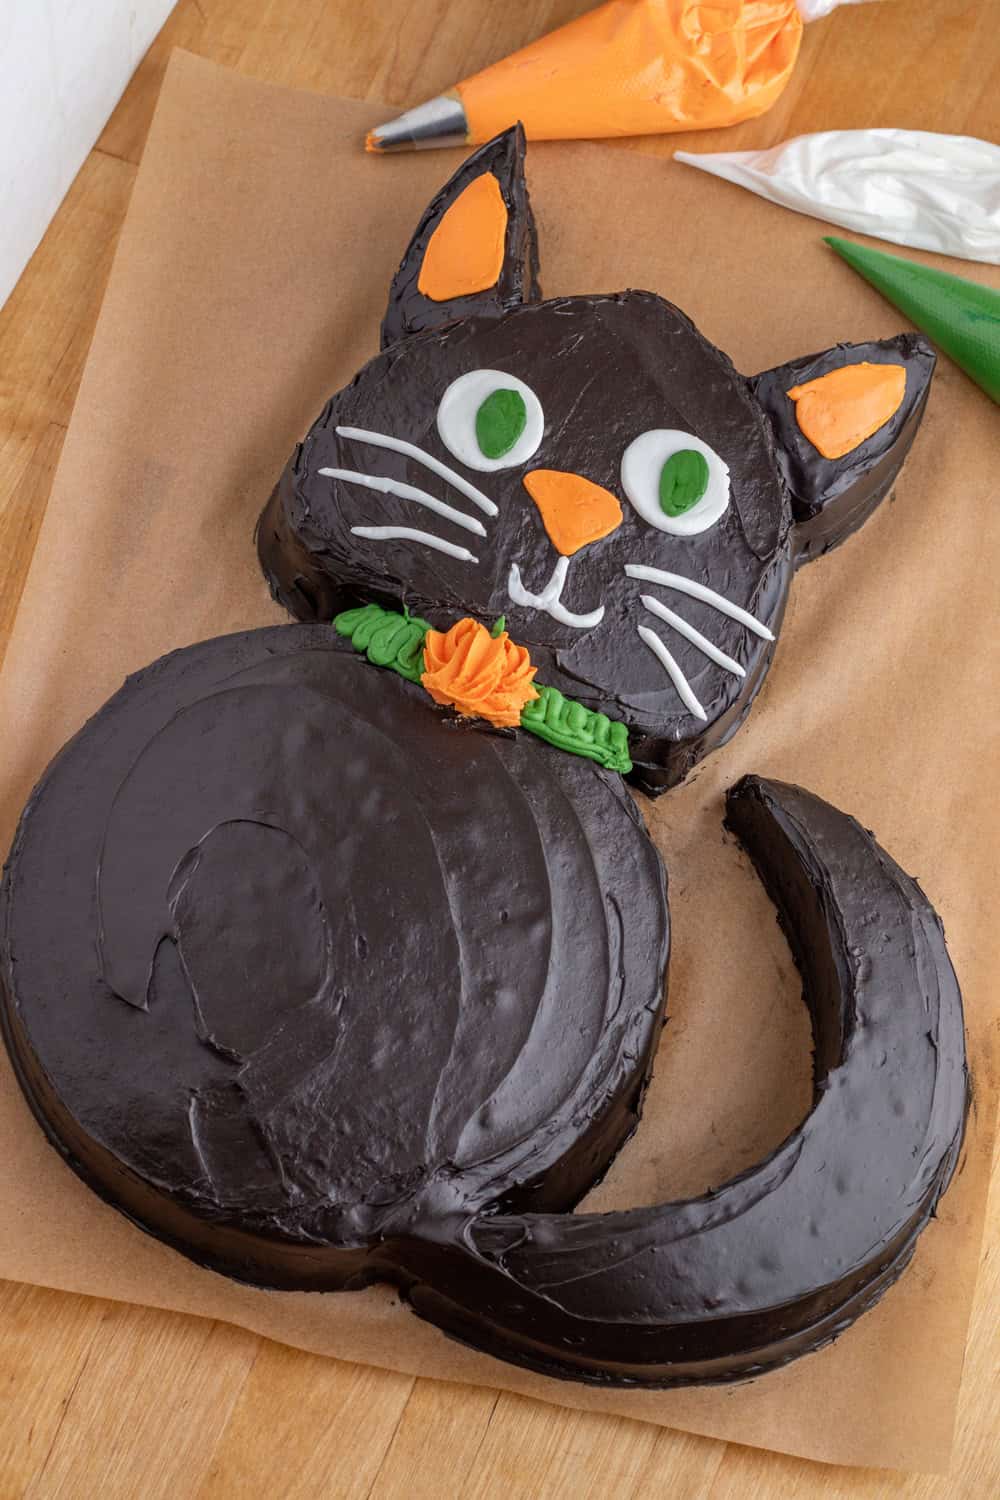
Position the main round cake on your serving platter or cake board to represent the cat’s body. Attach the piece from the second cake on top of the body for the head, and place the triangular pieces on top of the head to form the ears. Arrange the crescent shaped piece on one side of the body to create the tail.
Step 4: Ice Your Cake
Using an offset spatula, cover the entire cake with black icing. Smooth it out to create a sleek, even surface for your cat.
Step 5: Add Facial Features
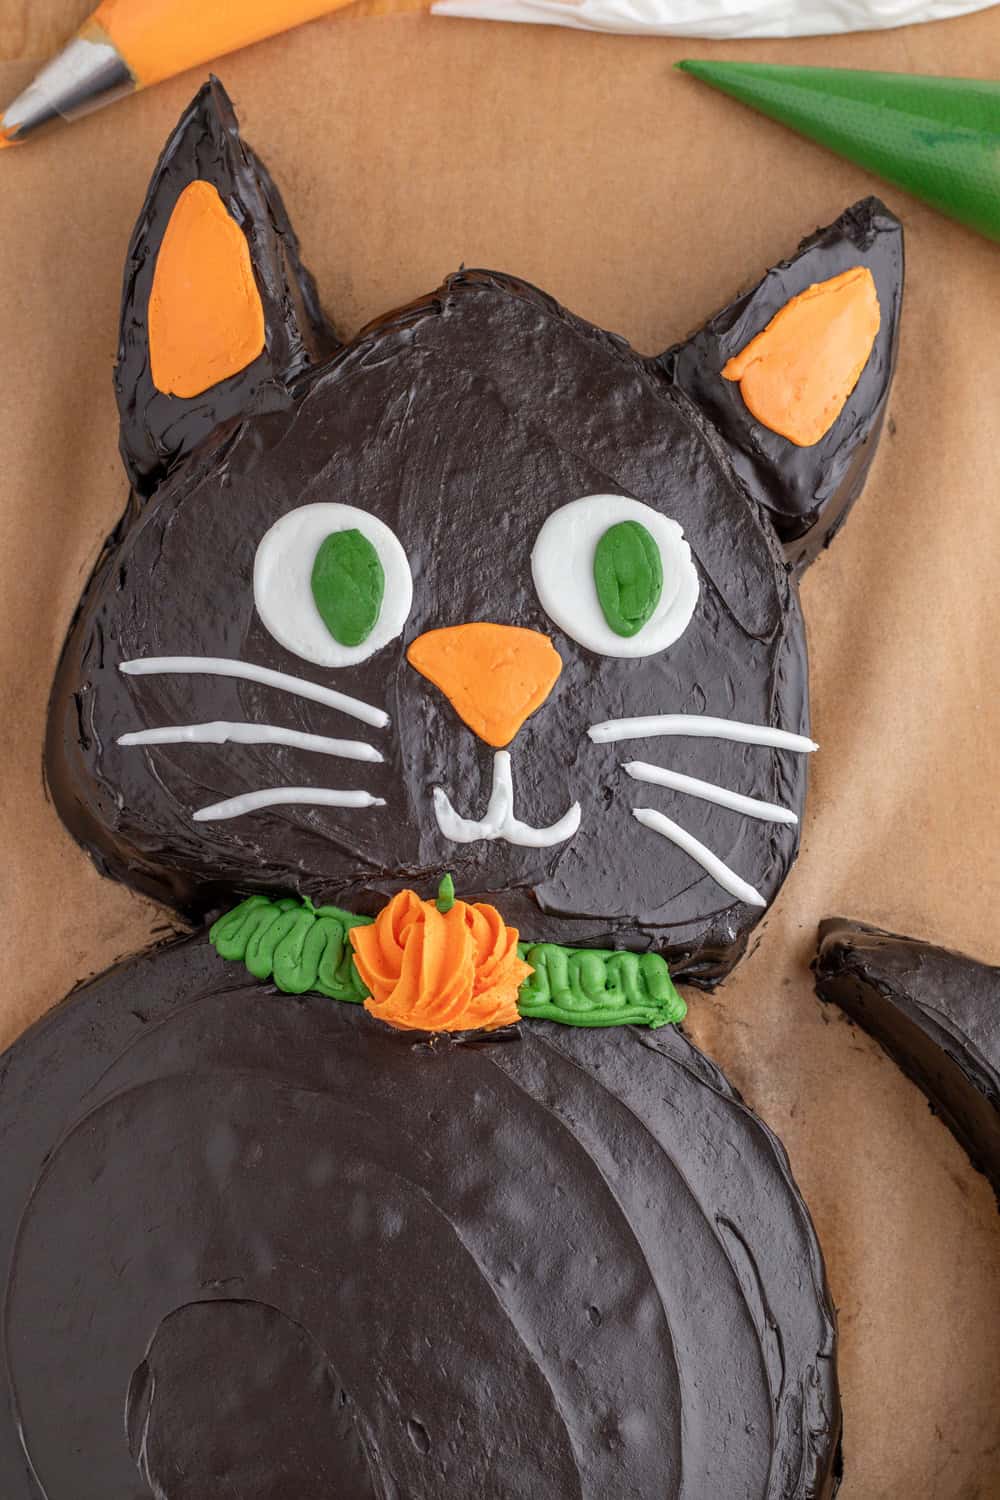
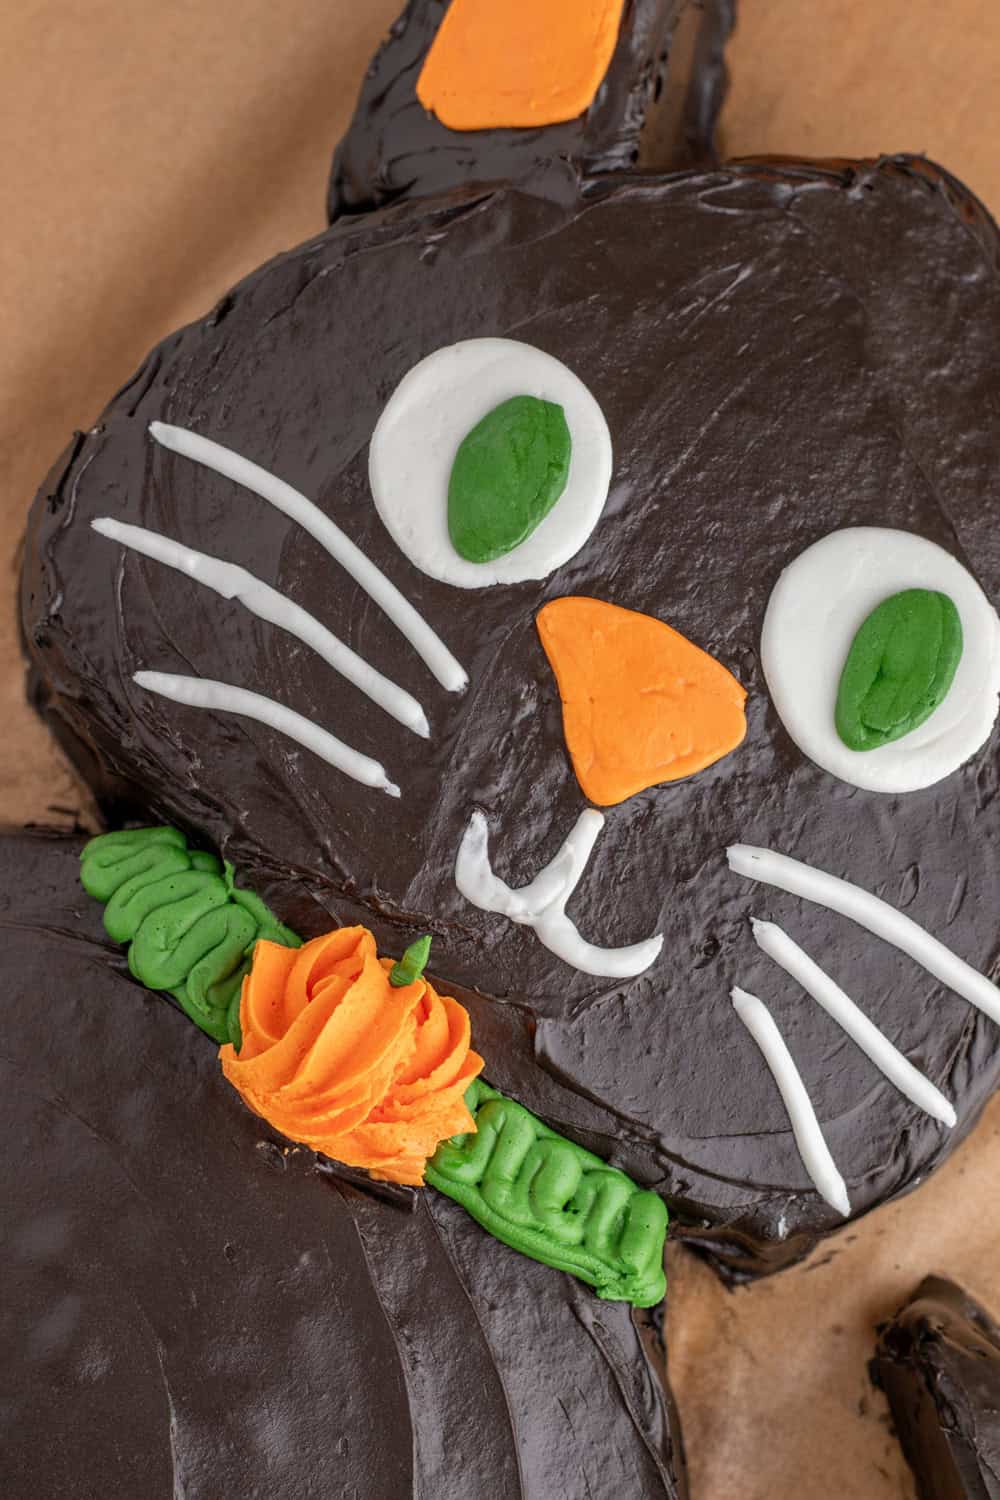
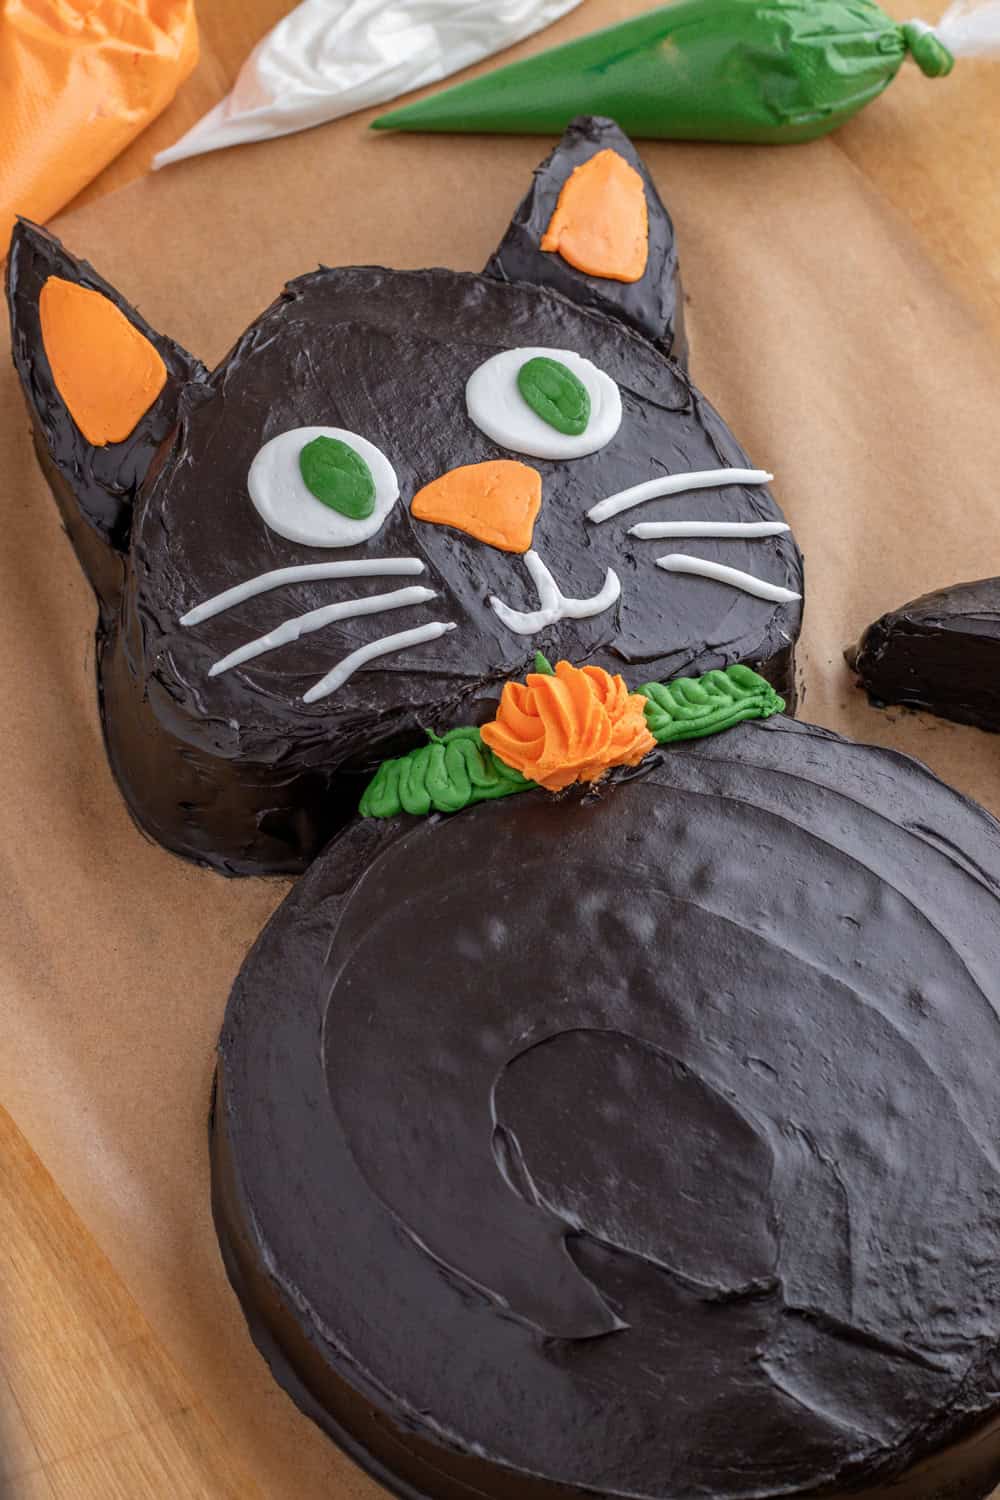
Pipe out two white eyes with green pupils, and use the white icing to add whiskers and a mouth. Use orange icing to create the nose, and for the details of the cat’s ears.
Step 6: Pumpkin Collar
Use the green frosting to pipe the base of the collar, then use the orange frosting and small star piping tip to create a pumpkin charm for the collar. You’ll do this by piping two small crescents, opposite ways from each other, and one line down the center of the crescents. You can use a bit more green frosting to add a stem to the top of the pumpkin charm.
Final Thoughts
Whether you’re whipping up a fun cake for a Halloween party, treating a cat-loving friend, or just enjoying a spirited baking project, this cake is sure to delight and spook in equal measure. Get ready to bake, decorate, and enchant with your own Halloween cake masterpiece! Make sure to get the kids involved in making this special Halloween treat.
Black Cat Cake Recipe
Ingredients
Equipment
Method
- Step 1: Bake and Cool Your CakesStart by baking your favorite cake mix in two 8 inch round pans according to the package instructions. Allow the cakes to cool completely before moving on to shaping and decorating.
- Step 2: Shape Your Black CatOnce cooled, place one cake on a clean, flat surface—this will be the body of the cat. For the second cake, use a sharp knife to cut it into pieces that will become the head, ears, and tail. Please see the photo to see how to cut the cake.
- Step 3: Assemble the CatPosition the main round cake on your serving platter or cake board to represent the cat’s body. Attach the piece from the second cake on top of the body for the head, and place the triangular pieces on top of the head to form the ears. Arrange the crescent shaped piece on one side of the body to create the tail.
- Step 4: Ice Your CakeUsing an offset spatula, cover the entire cake with black icing. Smooth it out to create a sleek, even surface for your cat.
- Step 5: Add Facial FeaturesPipe out two white eyes with green pupils, and use the white icing to add whiskers and a mouth. Use orange icing to create the nose, and for the details of the cat’s ears.
- Step 6: Pumpkin CollarUse the green frosting to pipe the base of the collar, then use the orange frosting and small star piping tip to create a pumpkin charm for the collar. You’ll do this by piping two small crescents, opposite ways from each other, and one line down the center of the crescents. You can use a bit more green frosting to add a stem to the top of the pumpkin charm.
Video
Tried this recipe?
Let us know how it was!
Agnes Hsu is a mom of three and has been inspiring parents and kids to get creative with easy activities and family friendly recipes for over 10 years. She shares her love for creative play and kids food to her 2MM+ followers online. Agnes' commitment to playful learning and kindness has not only raised funds for charity but also earned features in prestigious nationwide publications.