These Berry Fruit Basket Cakes Are the Sweetest Summer Treat
By using this site, you agree to our Terms of Use. This post may contain affiliate links. Read our disclosure policy.
Follow us on Instagram for more fun food ideas for kids!
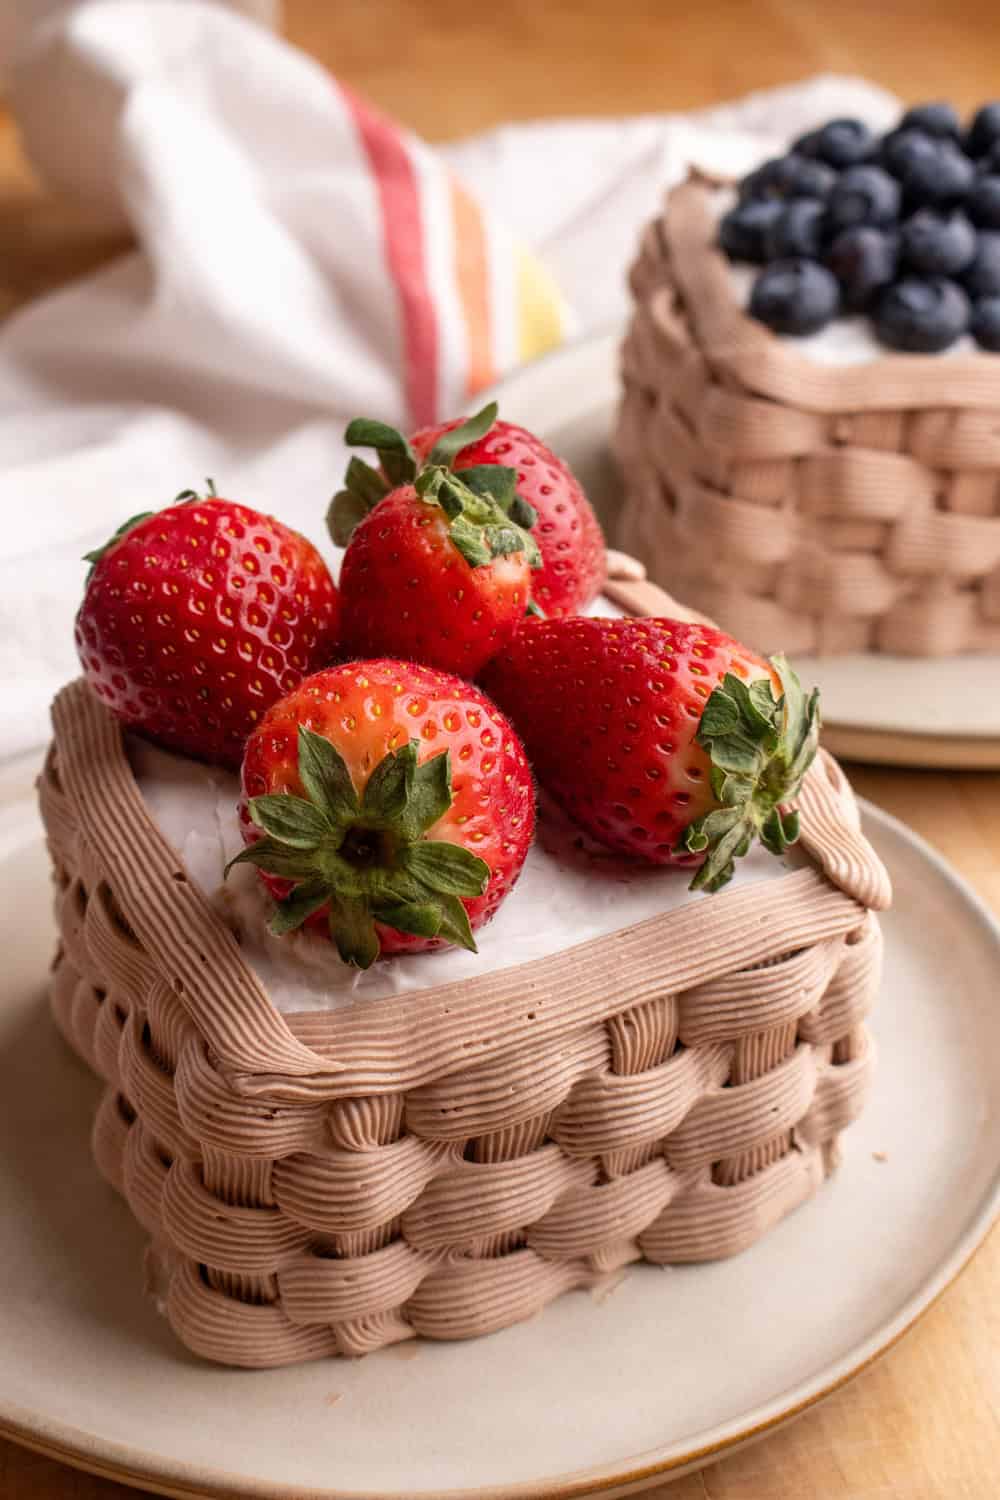
Learn how to make these adorable fruit basket cakes — a perfect sweet treat for summer parties, birthdays, or just because! Easy to decorate and almost too cute to eat.
These fruit basket cakes are the perfect dessert to add a touch of charm and sweetness to your table. With their basket-like appearance and colorful fruit topping, these mini cakes are as fun to make as they are to eat. Plus, they’re surprisingly simple to assemble, so you don’t need to be a professional baker to pull off this showstopper!
Here’s how you can create these delightful fruit basket cakes using an 8-inch square cake and a few simple decorating techniques.
Cake inspired by: Betty Crocker's New Cake Decorating Book
Berry Fruit Basket Cake - Ingredients
- One 8-inch square cake
- White frosting
- Light brown or tan icing (you can use a store-bought buttercream or tint white frosting with brown food coloring, cocoa powder, or ground cinnamon)
- Wilton #47 piping tip (or any similar basket-weave tip)
- Piping bag
- Fresh fruit (we used strawberries and blueberries, but feel free to get creative with your favorite fruits!)
- Offset spatula for frosting
How to make a basket fruit cake
Step 1: Cut the Cake Into Squares
Start by cutting your 8-inch square cake into four equal squares. You can use a serrated knife to slice the cake carefully into quarters. You’ll need two squares to form each little “basket,” so you’ll have enough for two individual cakes.
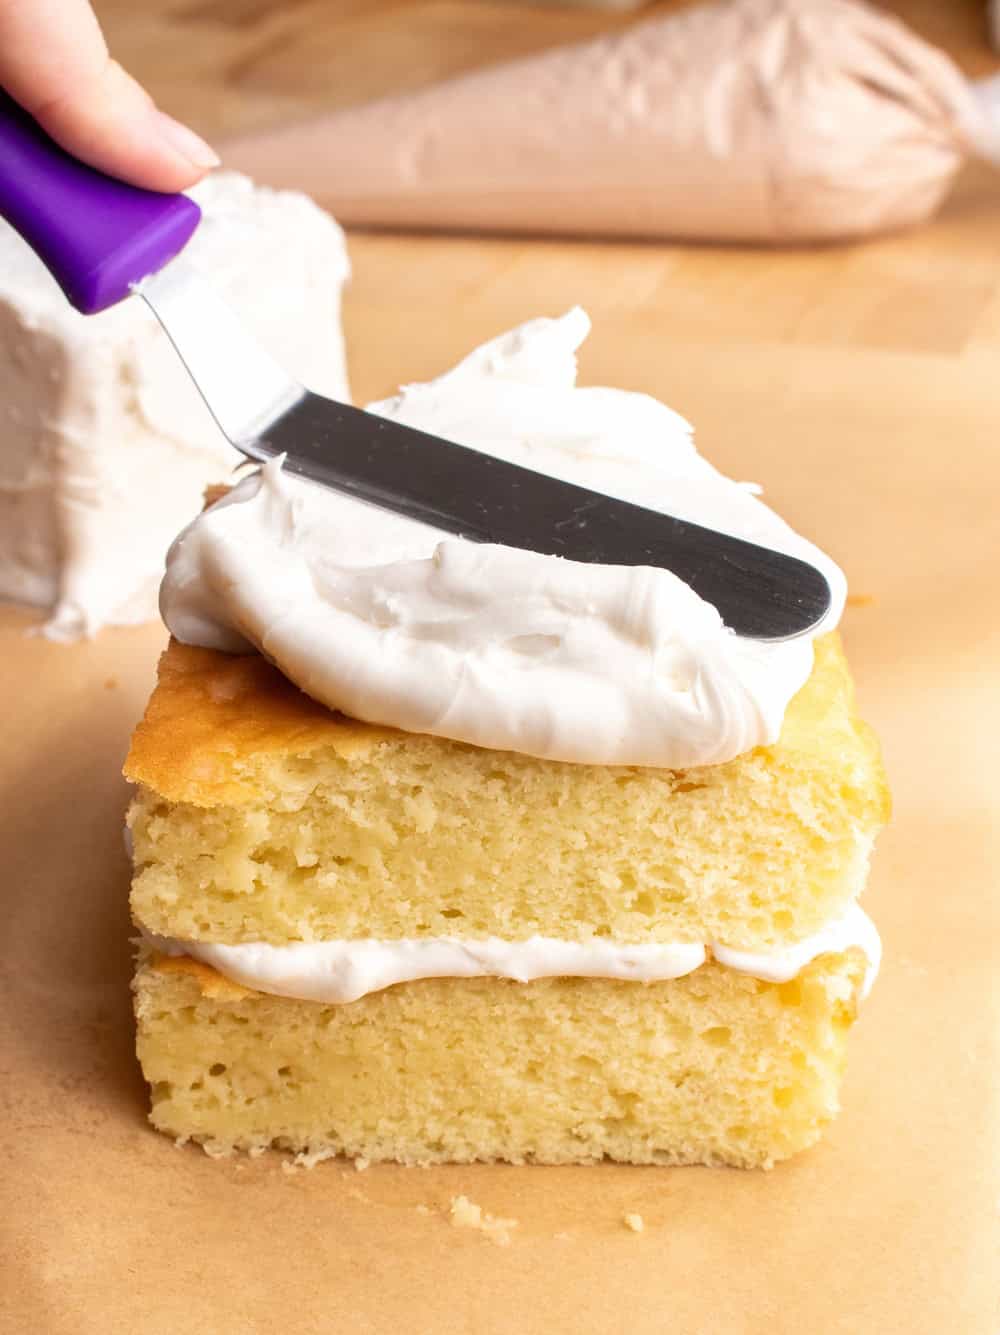
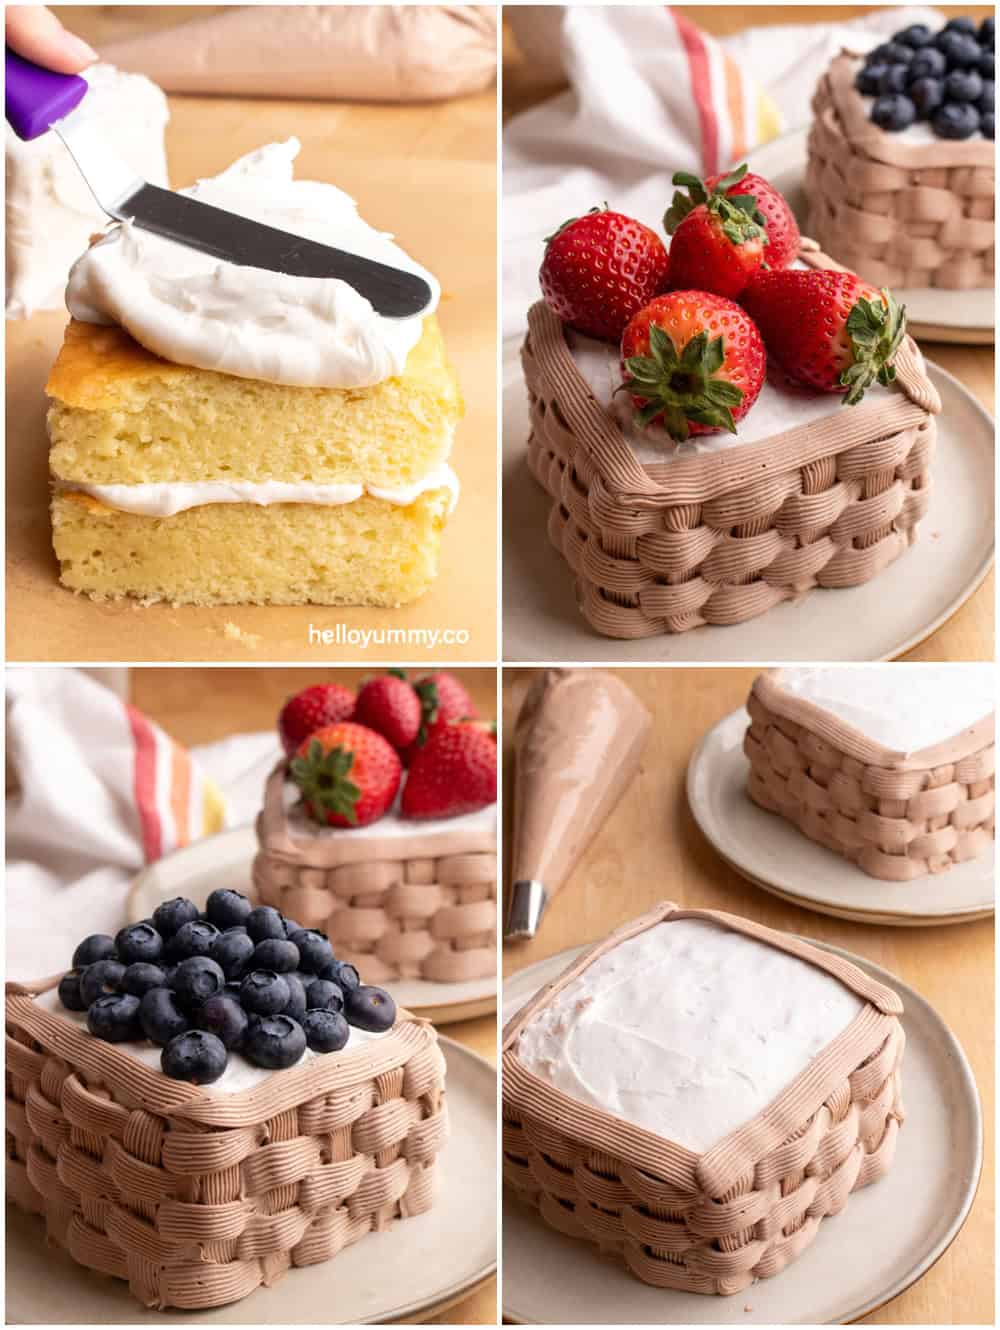
Step 2: Frost the Cake Layers
Take one of the cake squares and frost the top of it with a layer of white frosting. Don’t worry about making it perfectly smooth since you’ll be adding another layer on top. Place another square of cake directly on top of the frosted square. Now, frost the entire cake with white icing, covering both the top and sides. This layer of frosting will serve as your base and help the basket's texture stand out.
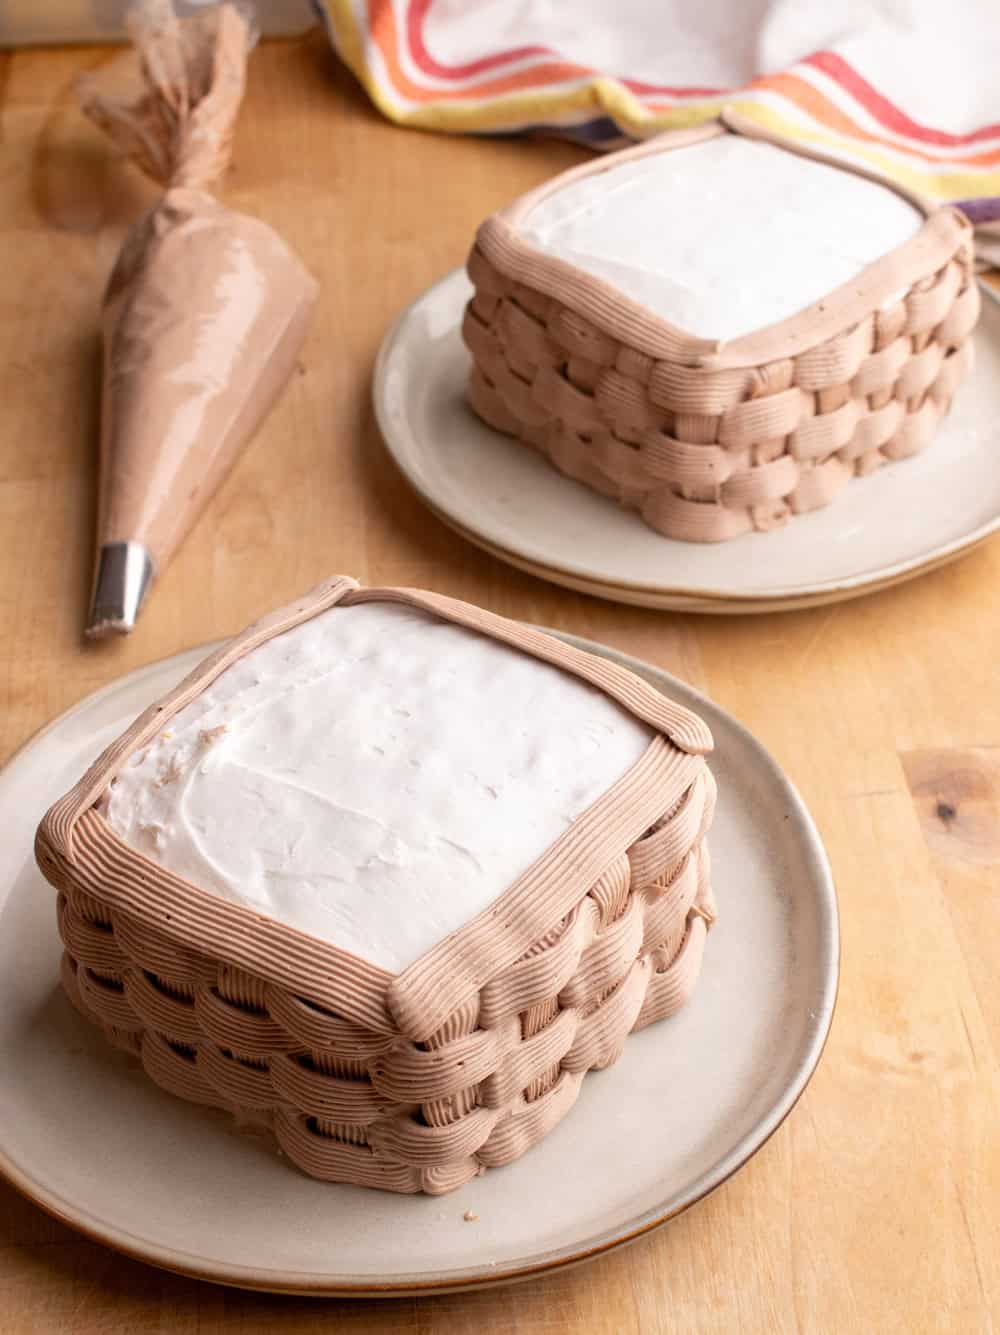
Step 3: Pipe the Basket Texture
For the next step, you’ll create the basket weave effect on the sides of the cake. Fill a piping bag with your light brown or tan frosting and attach a Wilton #47 piping tip (or a similar basket-weave tip).
Starting on one side of the cake, pipe a straight line of frosting from the top to the bottom of the cake. Then pipe three short lines with spaces between from top to bottom. Move your way along the sides, continuing to pipe in rows, making sure the lines are slightly interwoven, just like a real basket. Once all four sides are covered, pipe a border around the top edges of the cake to complete the look.
Step 4: Add the Fruit
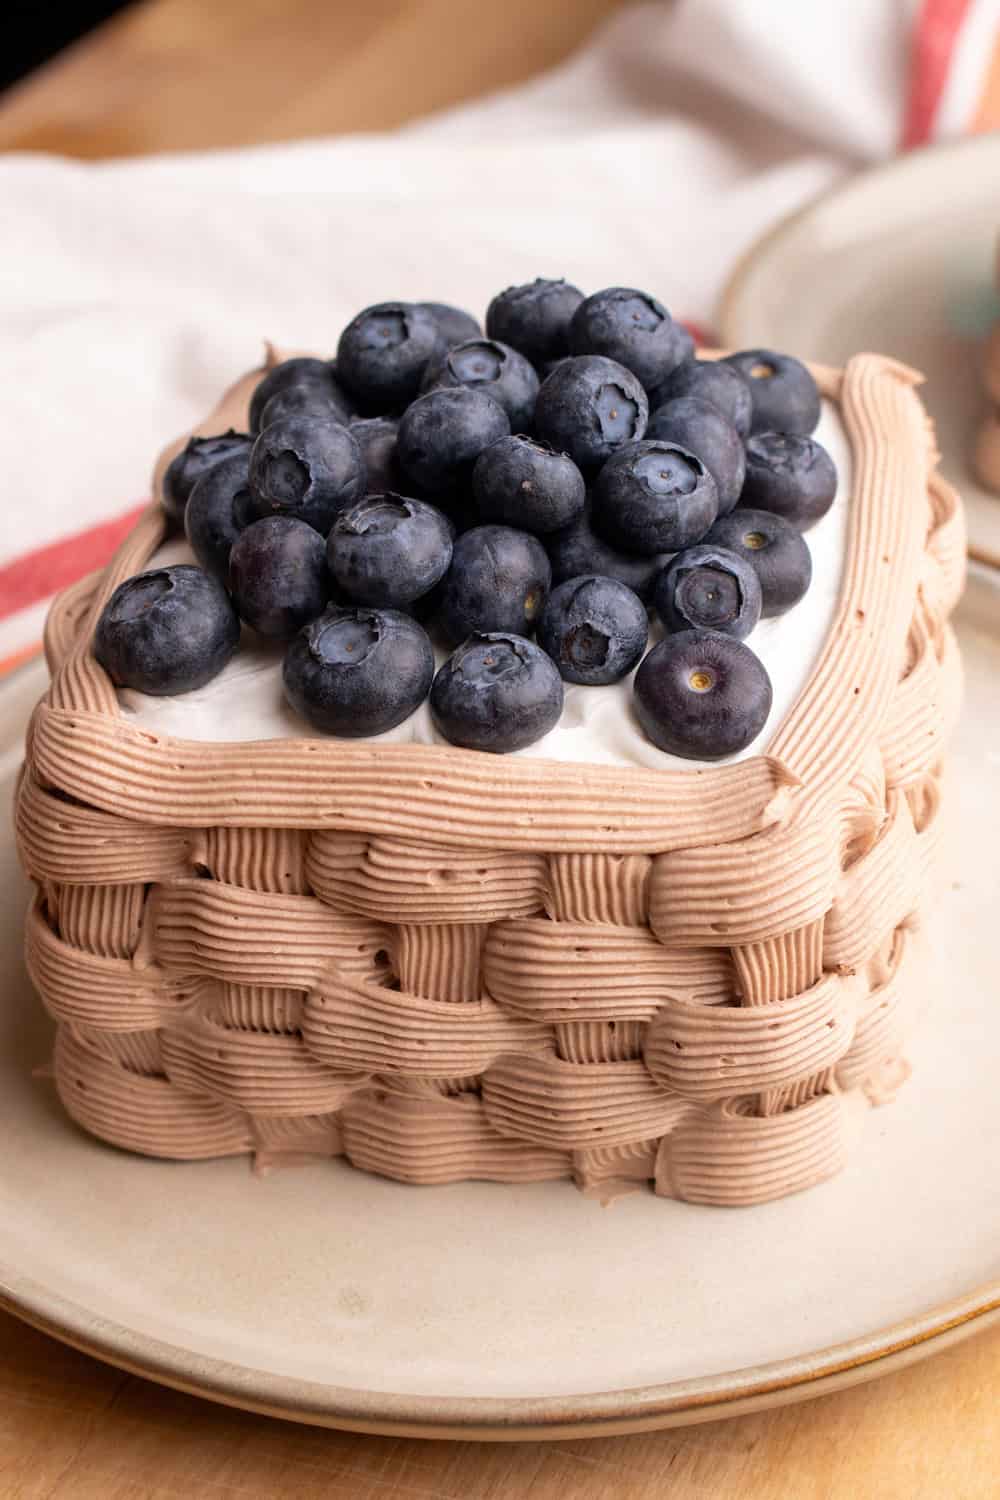
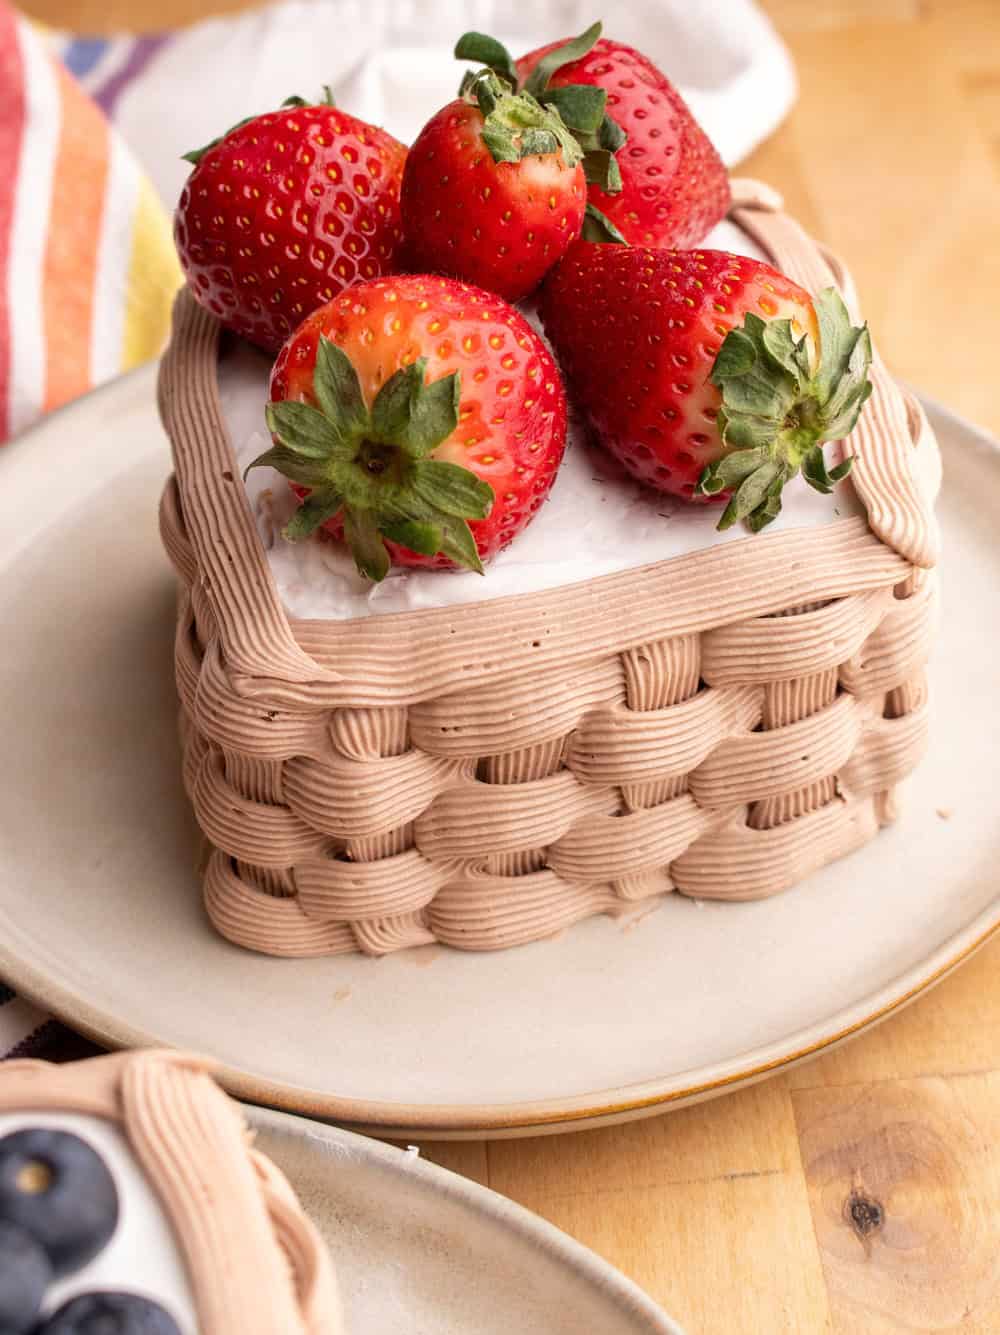
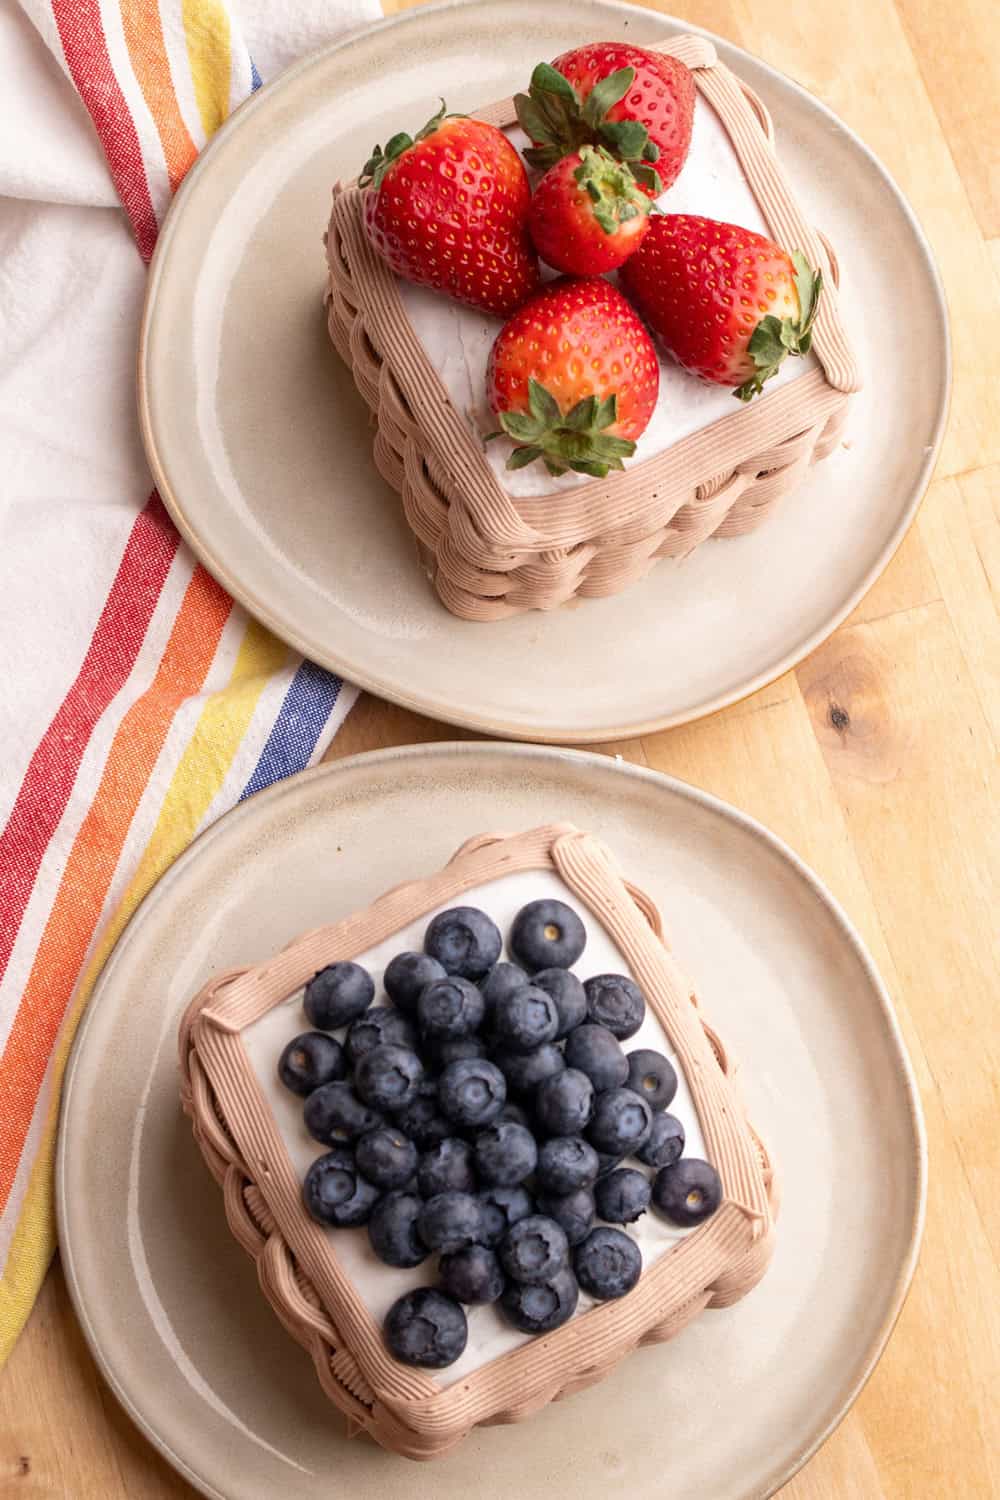
Arrange your favorite fruits on top of the cake to make it look like a full basket. We used strawberries and blueberries for a burst of color and sweetness, but feel free to get creative with fruits like kiwi, raspberries, grapes, or even small slices of citrus.
Place the fruit in a way that makes it look like it’s overflowing from the top, creating a fun and colorful centerpiece for your cake.
Step 5: Serve and Enjoy
Once your fruit basket cake is fully decorated, it’s time to serve! These cute little cakes are perfect for springtime gatherings, Easter celebrations, or any occasion where you want to bring a fresh, fruity twist to your dessert table. Not only are they delicious, but they also make for a beautiful display that’s sure to impress your guests.
Final Thoughts:
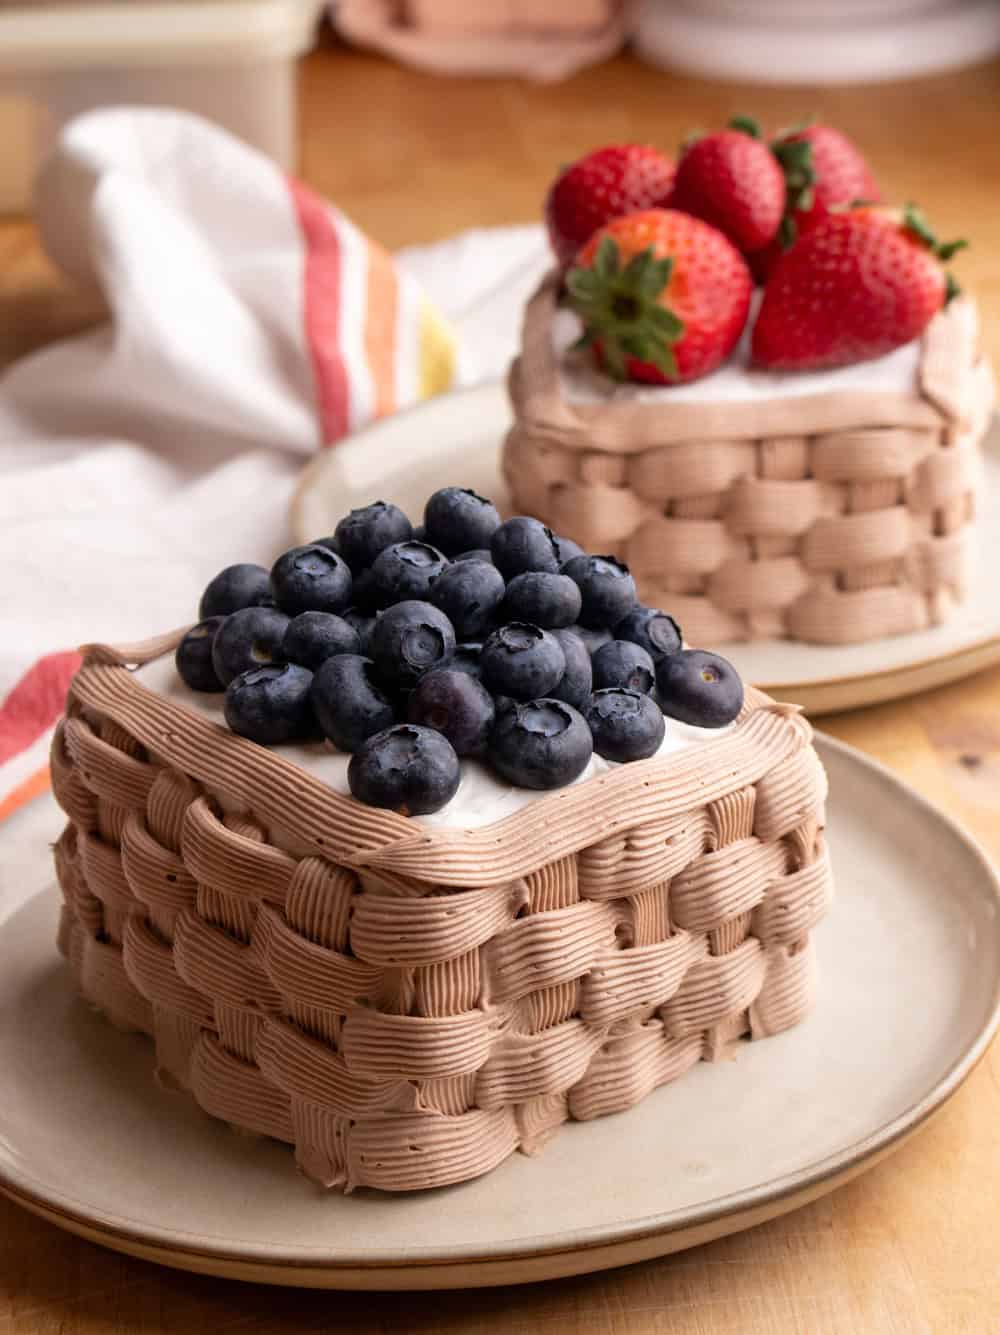
These fruit basket cakes are the ideal balance of sweet, fruity, and creative. They’re simple to make but look absolutely stunning, especially when you add the basket texture and the vibrant fruits on top. Whether you’re baking for a special event or just want a fun way to enjoy fresh fruit, these cakes are sure to be a hit.
A little cutting, frosting, and piping is all it takes to whip up these charming fruit basket cakes. They're the perfect sweet touch for springtime celebrations—and almost too pretty to eat!
Ingredients
Method
- Step 1: Cut the Cake Into Squares Start by cutting your 8-inch square cake into four equal squares. You can use a serrated knife to slice the cake carefully into quarters. You’ll need two squares to form each little “basket,” so you’ll have enough for two individual cakes.
- Step 2: Frost the Cake Layers Take one of the cake squares and frost the top of it with a layer of white frosting. Don’t worry about making it perfectly smooth since you’ll be adding another layer on top. Place another square of cake directly on top of the frosted square. Now, frost the entire cake with white icing, covering both the top and sides. This layer of frosting will serve as your base and help the basket's texture stand out.
- Step 3: Pipe the Basket Texture For the next step, you’ll create the basket weave effect on the sides of the cake. Fill a piping bag with your light brown or tan frosting and attach a Wilton #47 piping tip (or a similar basket-weave tip).Starting on one side of the cake, pipe a straight line of frosting from the top to the bottom of the cake. Then pipe three short lines with spaces between from top to bottom. Move your way along the sides, continuing to pipe in rows, making sure the lines are slightly interwoven, just like a real basket. Once all four sides are covered, pipe a border around the top edges of the cake to complete the look.
- Step 4: Add the Fruit Arrange your favorite fruits on top of the cake to make it look like a full basket. We used strawberries and blueberries for a burst of color and sweetness, but feel free to get creative with fruits like kiwi, raspberries, grapes, or even small slices of citrus.Place the fruit in a way that makes it look like it’s overflowing from the top, creating a fun and colorful centerpiece for your cake.
- Step 5: Serve and Enjoy Once your fruit basket cake is fully decorated, it’s time to serve! These cute little cakes are perfect for springtime gatherings, Easter celebrations, or any occasion where you want to bring a fresh, fruity twist to your dessert table. Not only are they delicious, but they also make for a beautiful display that’s sure to impress your guests.
Video
Tried this recipe?
Let us know how it was!
Agnes Hsu is a mom of three and has been inspiring parents and kids to get creative with easy activities and family friendly recipes for over 10 years. She shares her love for creative play and kids food to her 2MM+ followers online. Agnes' commitment to playful learning and kindness has not only raised funds for charity but also earned features in prestigious nationwide publications.